CBSync enables a user to book a room in the Cloudbooking Portal that will automatically sync with their calendar, and vice versa, to provide greater flexibility when making and editing room bookings.
Quick Content Links
How to make a room booking and add attendees
How to make changes to your booking using CBSync
How to make a room booking and add attendees
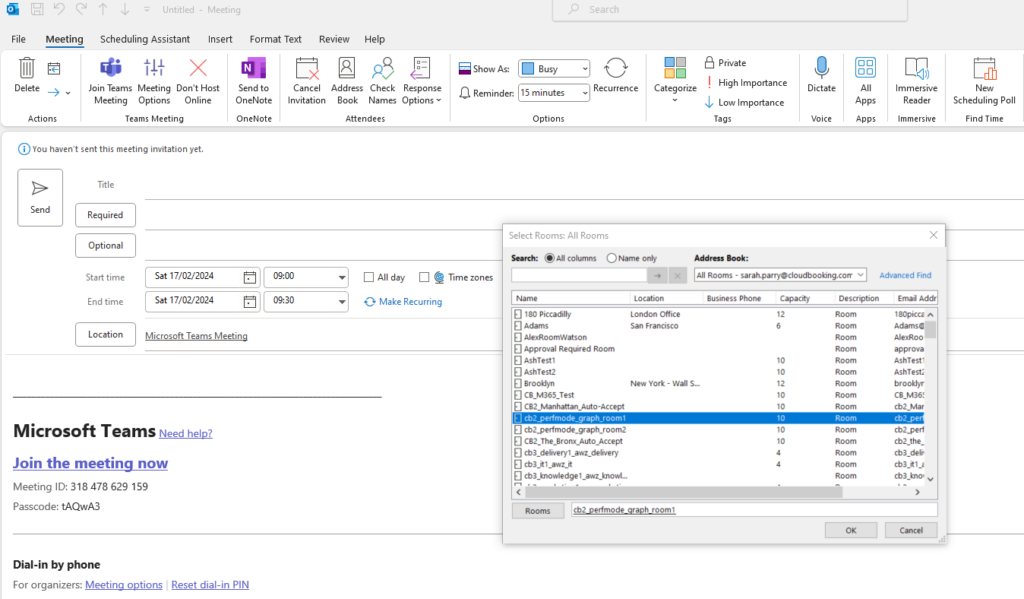
The room booking process remains the same. Select ‘New Meeting’ in the usual way within your email client.

After adding your meeting attendees and subject, use Location to select the room from the list.
The room that you wish to book must be set up to sync with Cloudbooking.
The room will be displayed as an ‘Attendee’ of the meeting and displayed as such hereafter.

When you have completed all required details for your meeting, click ‘Send’
Your booking will now be located within your calendar.

You will receive an email confirmation that your chosen room has accepted the meeting as an attendee.

The booking will also appear in the Cloudbooking Portal.

How to make changes to your booking using CBSync
If you wish to make any edits to your room booking, simply locate the meeting in your
calendar and double click to edit.

Make your required changes and click ‘Send Update’
The booking will be updated in your calendar, the calendar for your chosen room and in
the Cloudbooking Portal.
PLEASE NOTE – If you wish to move or change a room when editing your booking, ensure that you do so before clicking ‘Send Update’
If you remove the room from your booking, it is not possible to add it back or add an
alternative room if you have already clicked ‘Send Update’
In this instance, it would be necessary to delete the booking and create a new one.