Content Quick Links
Making a booking on behalf of another user in the Cloudbooking Portal
Making a booking as a delegate
Adding delegate access to user calendars
Making a booking on behalf of another user in the Cloudbooking Portal
Log in to your Cloudbooking account via your portal URL.
Select your preferred booking option from the menu on the left
From the booking window, Select ‘On Behalf Of’
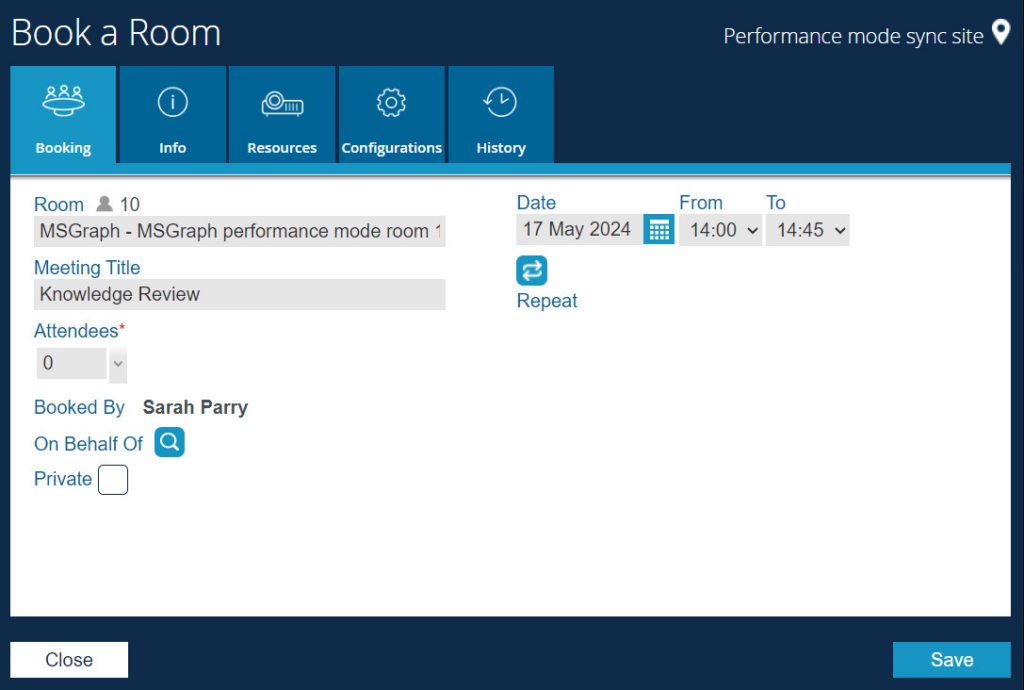
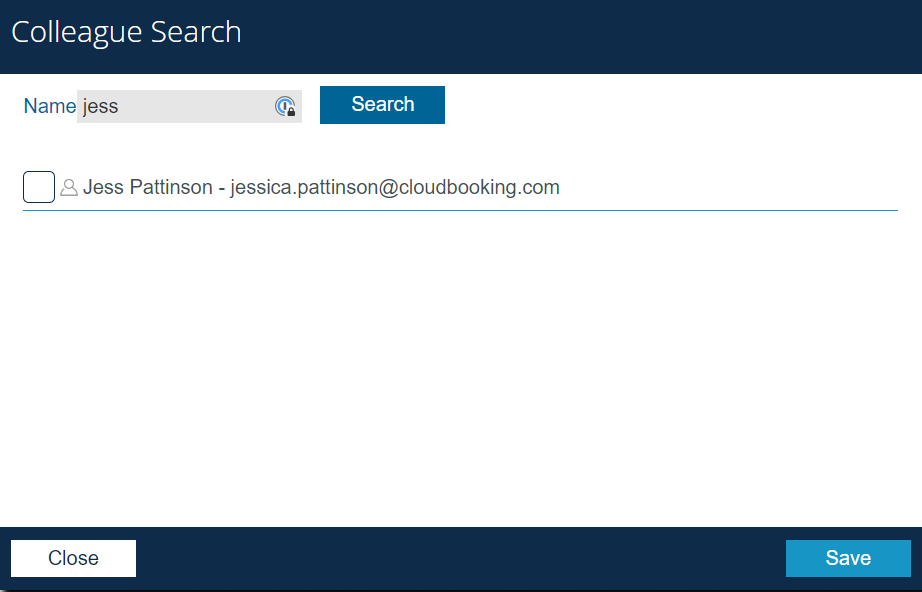
Search for the user you wish to book on behalf of and click the tick box next to their
name.
You will now be returned to the booking window where the user you have selected will be shown in the ‘On Behalf of’ field.
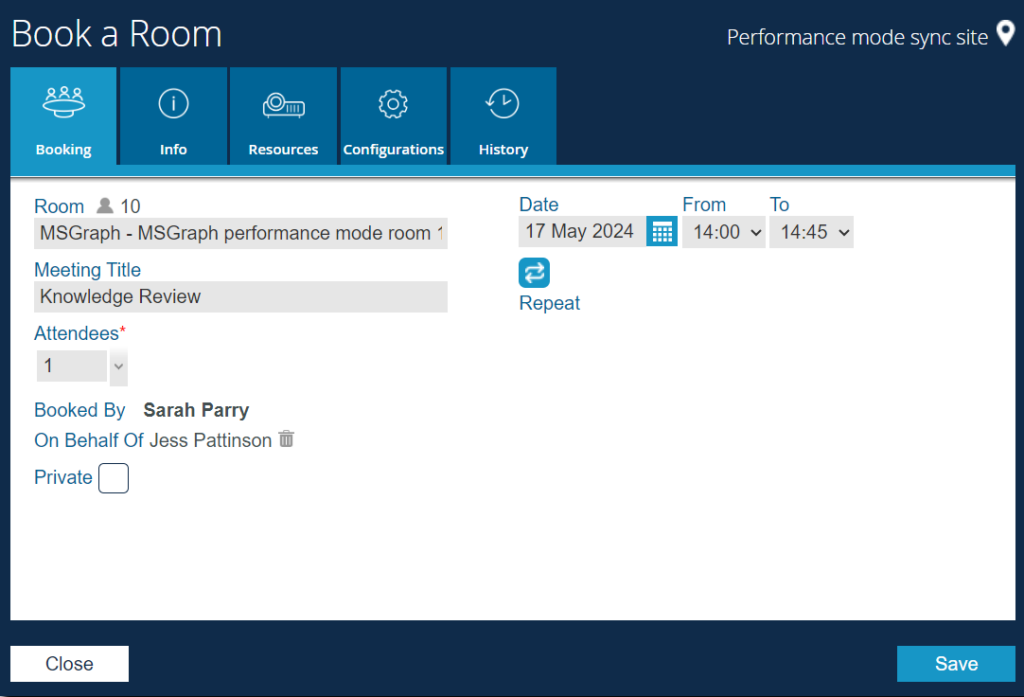
You can ensure all other details of your booking are correct and complete your booking
here by clicking ‘Save’
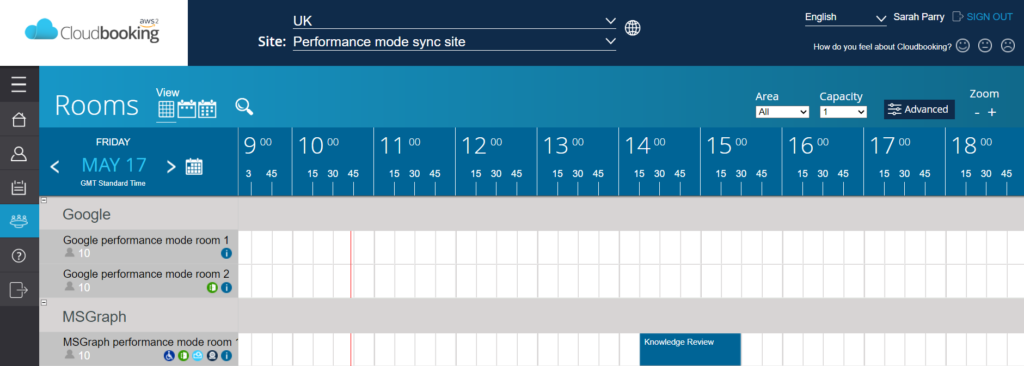
The booking will now appear in the Cloudbooking portal and the calendar of the user it
was booked on behalf of. Your name will not appear on the booking.

Bookings can be edited, amended and deleted via the calendar or the
Cloudbooking Portal. The user calendar will update automatically.
Making a booking as a delegate
First of all, you will need to add delegate access to your calendar. You will
find instructions for ADDING DELEGATE ACCESS TO CALENDARS at the end of this
guide.
Make a booking in the selected user calendar, ensuring first that you have the correct
permissions to do so.
Invite the room you wish to book as an attendee.
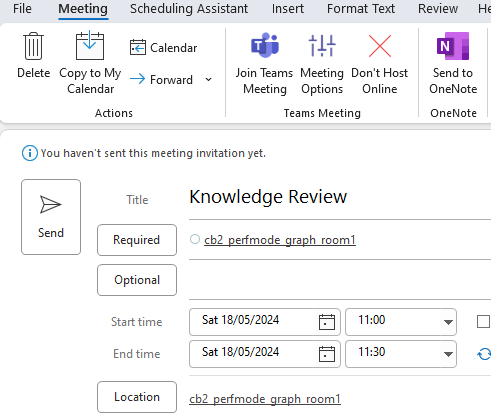
Complete your booking by sending the meeting invite.
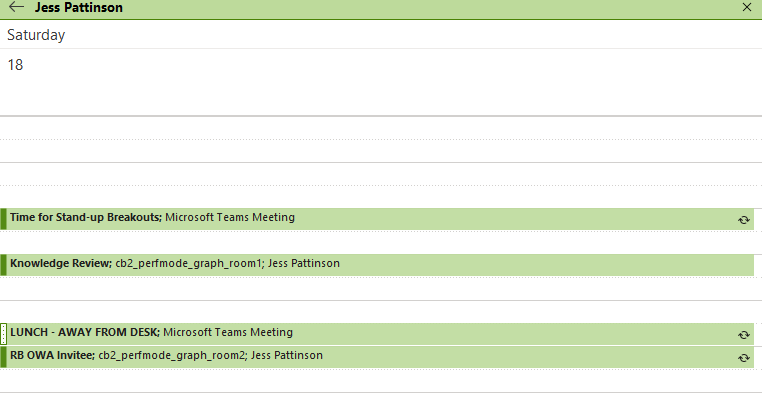
The booking will now be added to the calendar of the user you have booked on behalf of and the Calendar of the room you have booked.
Your name will not appear on the booking.
Bookings can be edited, amended and deleted via the Exchange calendar or the
Cloudbooking Portal. The user calendar will update automatically.
Adding Delegate access to user calendars
Adding a delegate to Windows Desktop
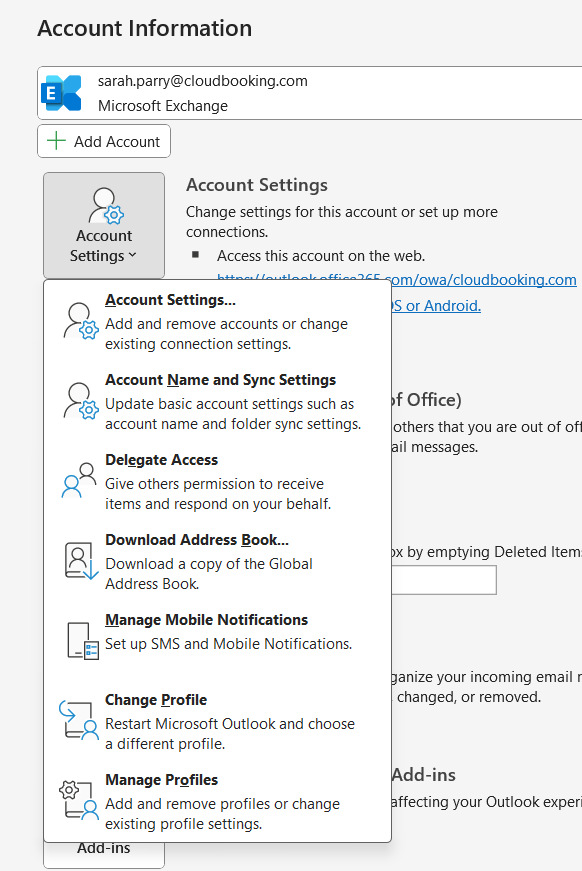
In the Outlook Desktop App. Firstly, select ‘File’ from the top ribbon, then navigate to
‘Account Settings’ and select ‘Delegate Access’ from the drop-down
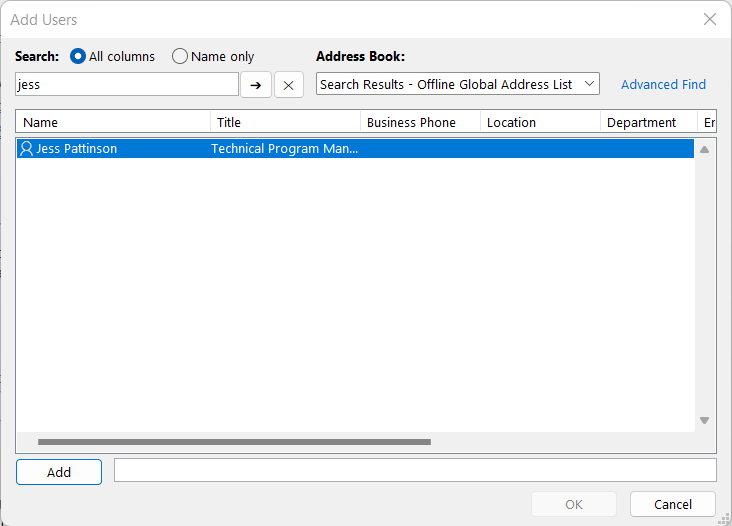
When the window opens, add the first delegate by clicking the Add button to search for the person you would like to select as delegate, ensure that they are selected,
click add then click OK.
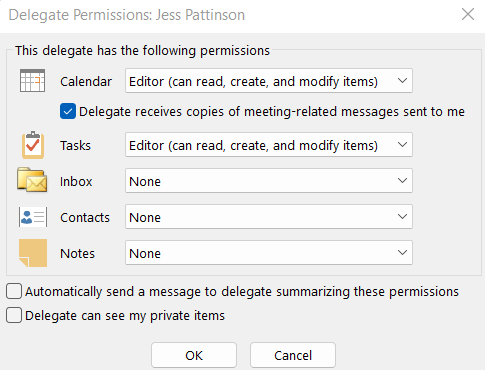
You will see Calendar editor is selected by default but you will see other options if you click on the drop down.
When the delegate creates a meeting request on your behalf, they will also get notification of acceptance for this booking.
Adding a delegate to a MAC Desktop
Go to your calendar view within Outlook
Against your name go to Account Settings
Select Delegation and Sharing
Click + and search the delegate you wish to add
Use dropdowns to view change permissions/views etc and modify if necessary
Click OK
To remove, click on the delegate then click the – button at the bottom of the window
click Done
Adding a delegate on Online Web Application (OWA)
Go to Calendar, click on Share button on top ribbon
Search for person you would like to select as your delegate, you will then be presented
with a list of permissions, select Delegate from bottom of dropdown
if you would like the delegate to view private bookings, make sure this is selected
Click Share button
Delegate will be displayed on screen
To remove a delegate, click on the Remove button and the person will be removed from
your calendar as a delegate.