Quick Content Links
Booking a parking space
Repeat bookings
Pin colours explained
Parking waitlist
Assigning a parking space
Editing parking availability
Checking in to and out of your booking
Editing your booking
Curtailing your booking
Cancelling your booking
Editing or deleting a repeat booking
If you need further assistance, please email hello@cloudbooking.com
Booking a parking space
Log in to Cloudbooking using your portal URL to access the home screen.

Select the site for your booking, then choose ‘Parking’ from the left-hand menu to access the car park plan.
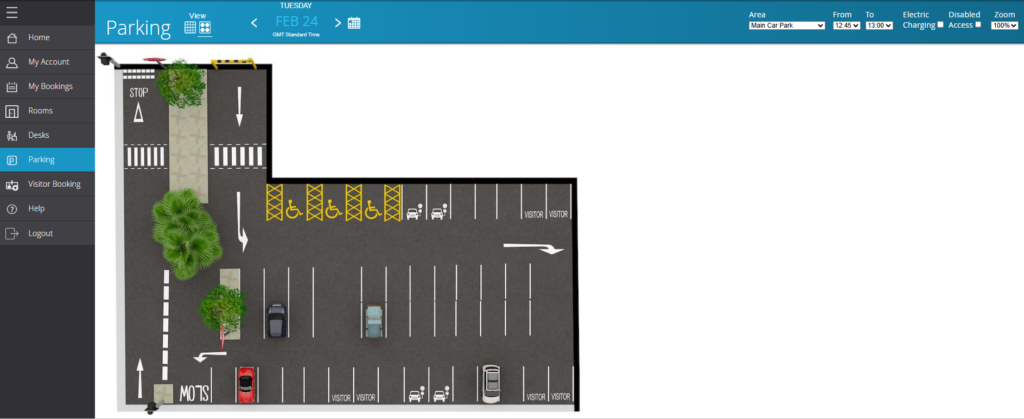
In the top right, you can select an area and times for your booking.
Also, whether the space has electric charging and/or disabled access available.
The car park plan will update accordingly, based on your selections.

Select the space you wish to book by clicking a green pin to open the ‘New Parking Booking’ screen.
Select the date & times required, enter the vehicle registration, make & model, then click ‘Save’ to complete your booking.
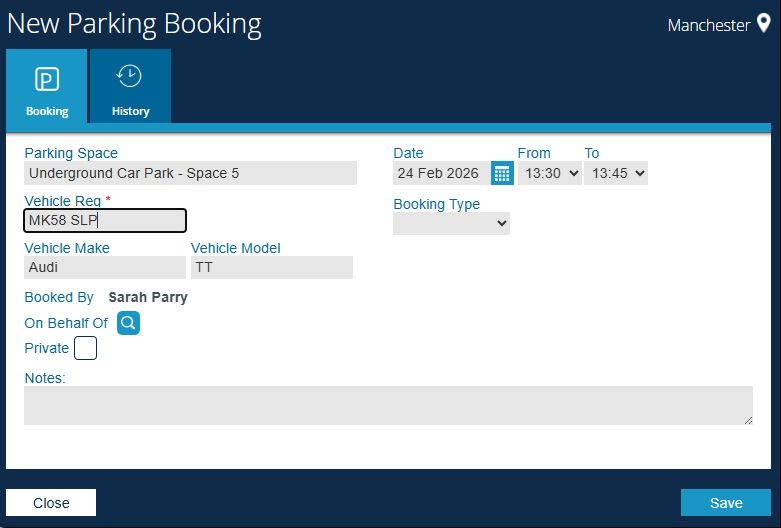
You will receive a confirmation that your booking has been successful. It will now appear in ‘My Bookings’, on the ‘Parking’ booking grid and as a blue pin on the car park plan.
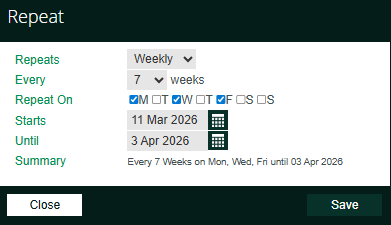
Repeat bookings
To create repeat bookings, select the ‘Repeat’ icon, choose a frequency, and click ‘Save’.
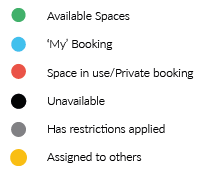
Pin colours explained
Parking spaces are shown as coloured pins, indicating their availability status.
Parking Waitlist
If the parking spaces for a particular day are fully booked, an option to add yourself to the parking waitlist will be displayed.

Clicking on the waitlist will add you.

If a parking space becomes available on the specified date, an email will be sent to everyone on the waitlist.

You will then be able to book the parking space on the portal.
Please note that once the parking space is booked, you will be automatically removed from the waitlist.
Assigning a parking space
Assigning parking allows administrators to permanently allocate specific parking spaces to users, negating the need for daily bookings.
If you need a parking space allocated to yourself, please contact your administration team.
Editing parking availability
If you want to release a parking space that is assigned to you for a period of time (If you are on annual leave or out of office) you can release the parking space yourself for a defined period.
Select ‘My Account’ to access ‘Edit Parking Availability’.
Navigate to the Assignments tab for the specific space.
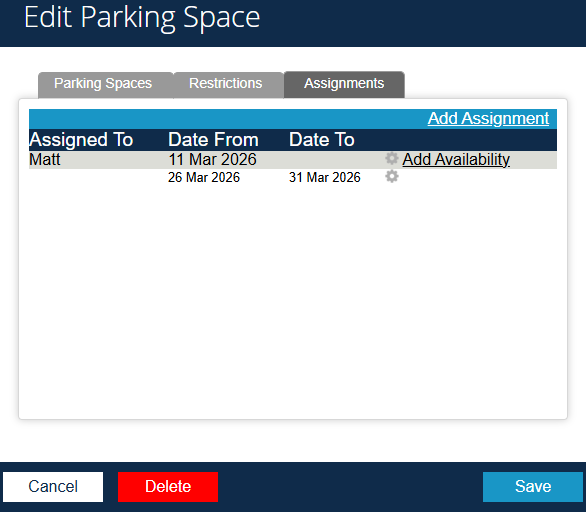
Click ‘Add Availability’
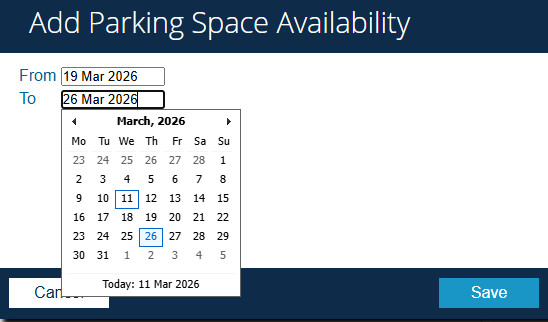
Enter the dates the parking space should be available and click ‘Save’.
The space will be available for others to book only during the dates you have specified but will be assigned back to you automatically after that period.
Checking in to and out of your booking
When you arrive at your booking, you can check in to let your colleagues know you’ve arrived.
Select the booking from ‘My Bookings’ list to open the parking booking screen and select ‘Check in’.
You’ll receive confirmation that your check in was successful.
Your check in will be displayed in the app.
When you are leaving your booking, you can check out to let your colleagues know you’ve left.
Select the booking from ‘My Bookings’ list to open the parking booking screen and select ‘Check out’.
You’ll receive confirmation that your check out was successful.
Editing your booking
The steps for editing, curtailing, or cancelling a booking are the same for rooms, desks, parking, and bikes. This example uses parking but the process is identical for all.
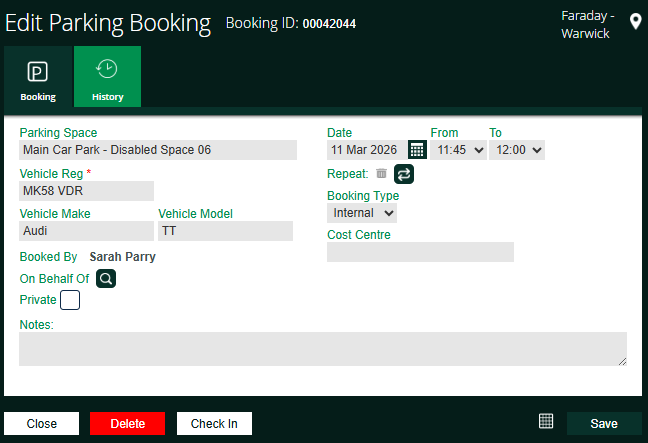
Select the booking from your ‘My Bookings’ list to open the Edit Parking Booking screen.
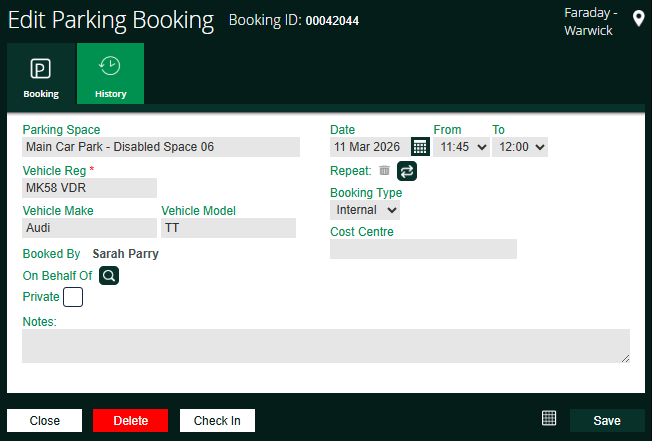
Make your changes and select ‘Save’. A success message will confirm the update, and the changes will appear in ‘My Bookings’.
Curtailing your booking
If a booking has already started, you can’t cancel it — only curtail it, which ends it from that point onward and releases the space.
Open the booking, then select ‘Curtail’ on the Edit Parking Booking screen.
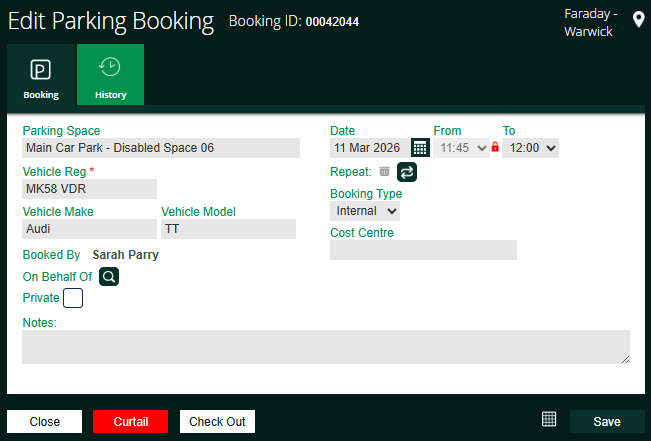
Select ‘Yes’ to curtail. You’ll receive a success message, and the booking will move to Curtailed.
Note: If curtailed within the first 15 minutes, it will also be removed from the
booking grid.
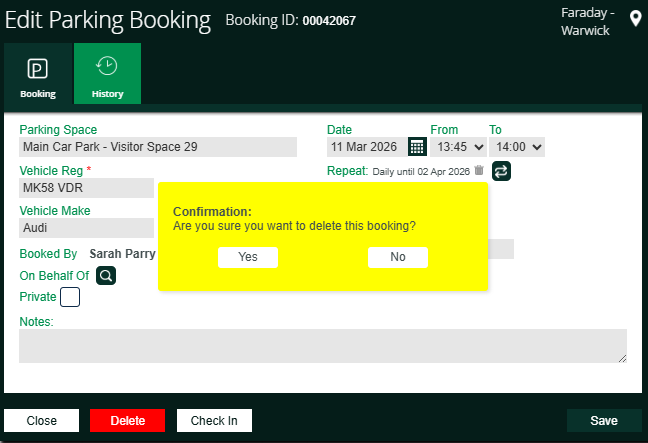
Cancelling your booking
Open the booking as before, then select ‘Delete’ on the Edit Parking Booking screen.
You’ll be asked to confirm the deletion.
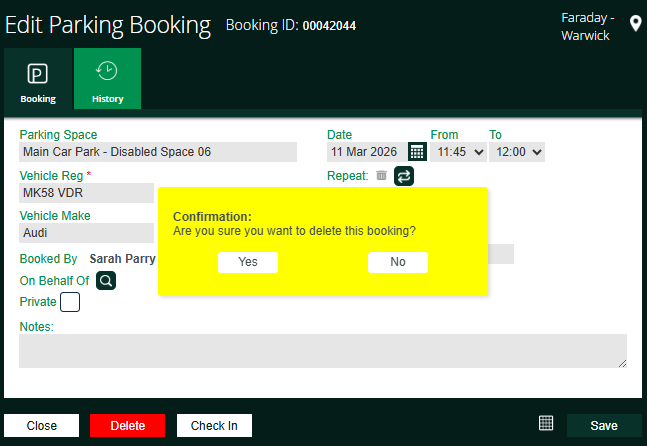
Select ‘Yes’ to cancel. You’ll receive a success message, and the booking will move to Cancelled instead of upcoming.
Editing or deleting a repeat booking
To edit – Make your updates, choose whether to edit one instance or the entire series, and confirm.
A success message will appear, and the booking will be updated.
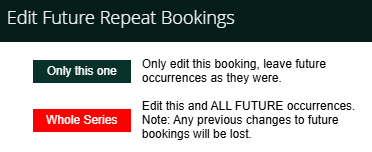
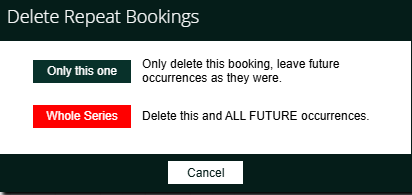
To delete – Click ‘Delete’, you’ll be asked to confirm if you wish to delete the booking.
Choose whether to remove one instance or the entire series, and confirm.
You’ll receive confirmation that your booking was successfully deleted, and the booking will be removed.