Quick Content Links
Making a single room booking in the Cloudbooking Portal using Teams Connect
Adding Attendees
Deleting or editing a single booking
Making a repeat booking
Editing a repeat booking
Deleting a repeat booking
Making a single room booking in the Cloudbooking Portal using Teams Connect
Firstly, log into your Cloudbooking account via your portal URL.
Select the site you want to make your booking in then select Rooms from the menu on the left.
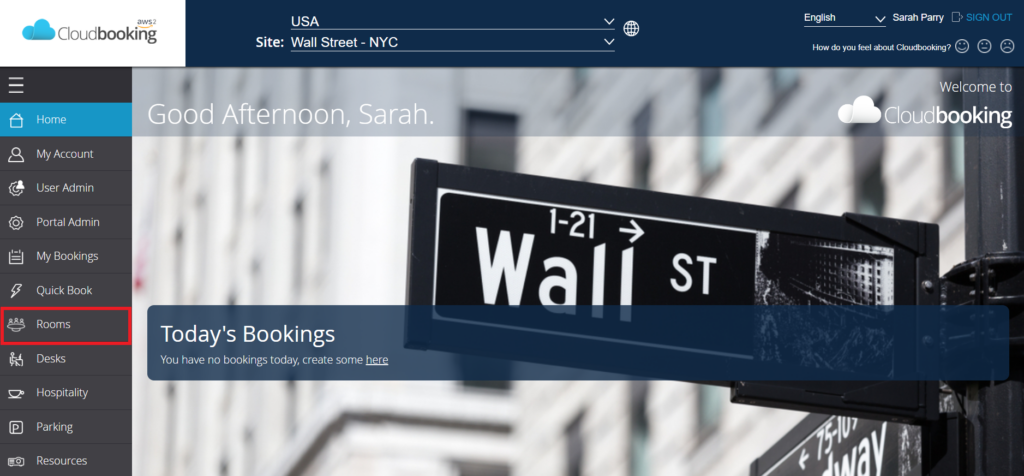
Select the room you wish to book from the grid.
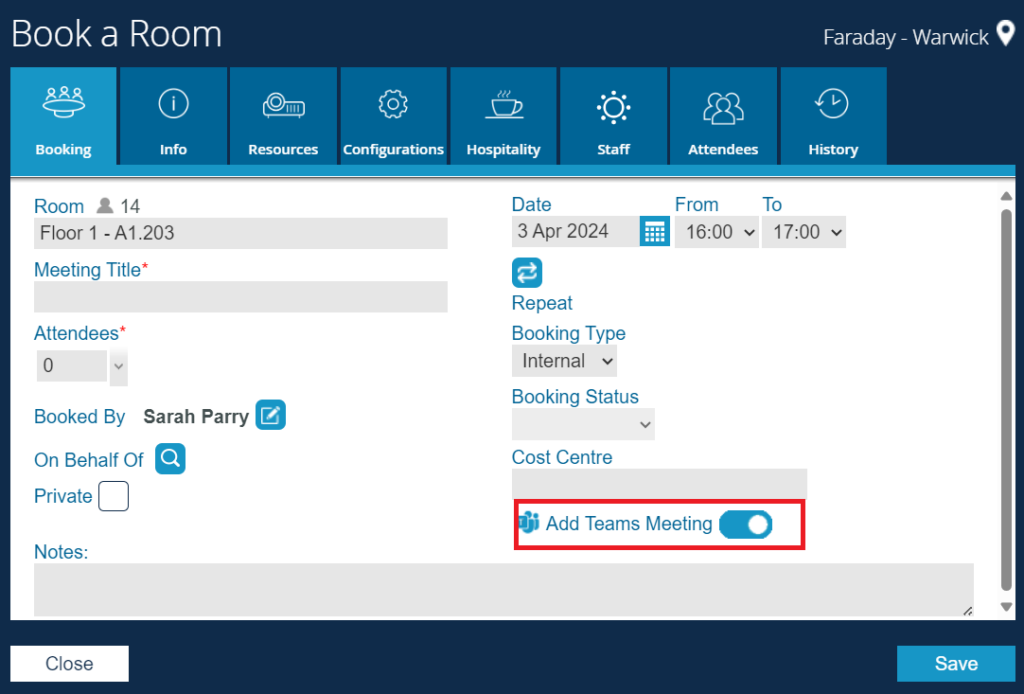
Complete the Book a Room information form. As shown below, the Add Teams Meeting toggle is enabled by default.
Adding attendees
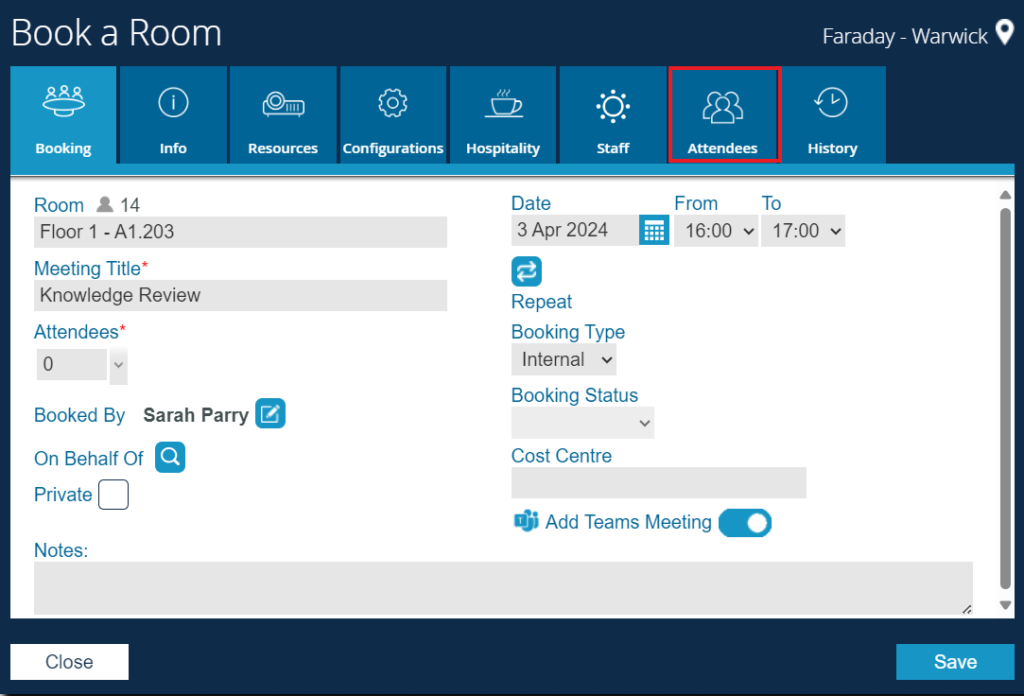
To add attendees to your meeting, click on the Attendees Tab.
Click on Add Colleague.
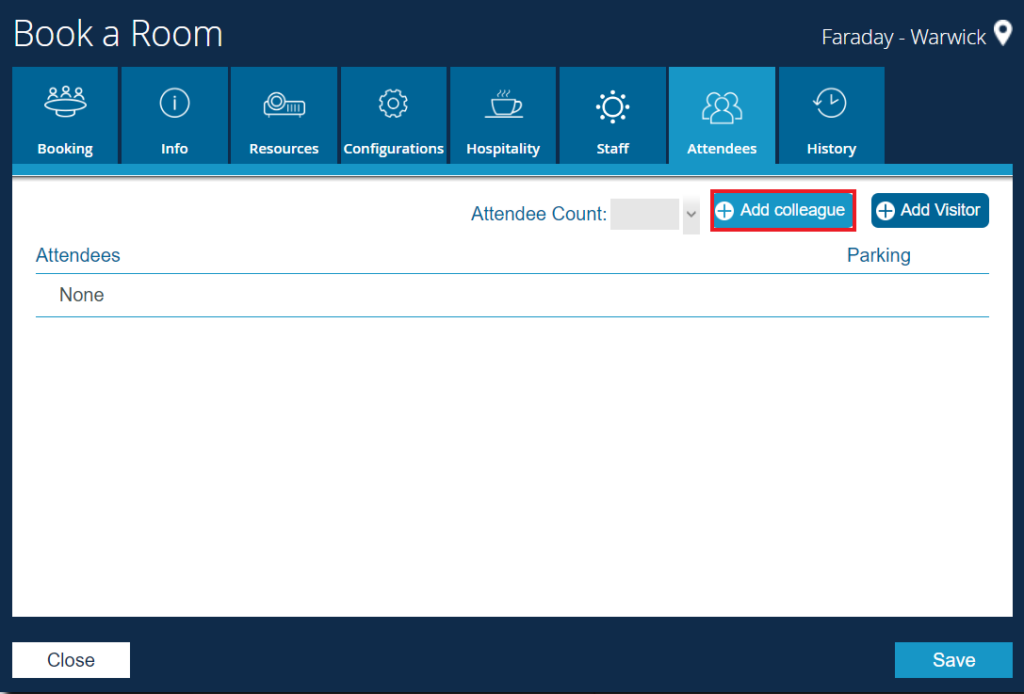
The following screen will open:

Enter the name of the colleague you wish to attend your meeting and click Search.

Ensure the box is ticked and press Save.
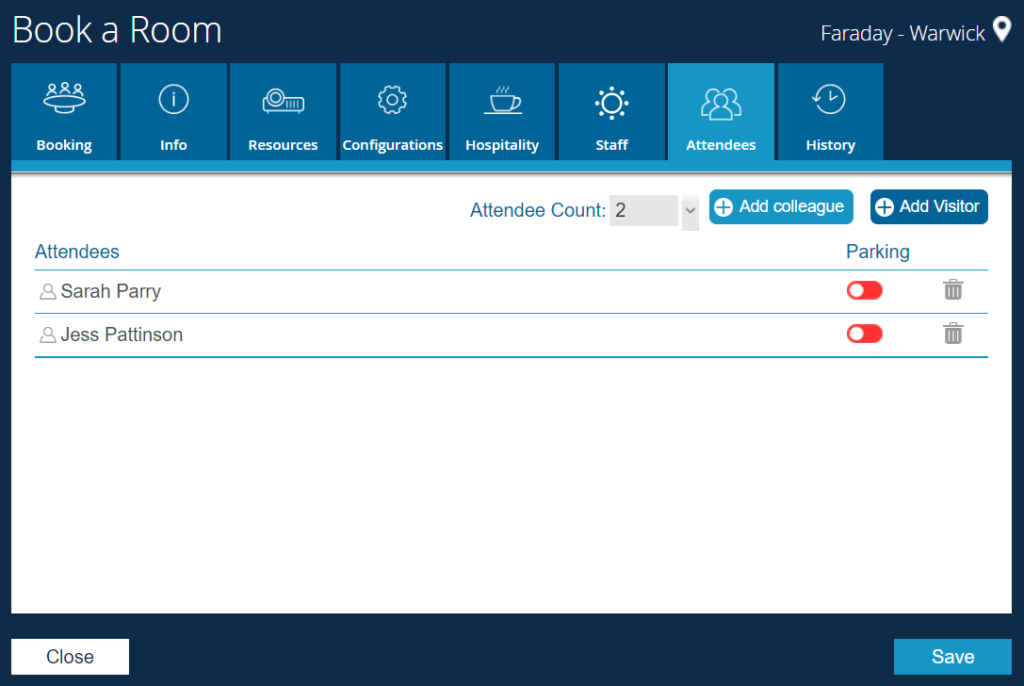
The colleagues you wish to attend your meeting will be listed as below. Ensure the details are correct and click Save.
The organiser will receive a notification that the booking has been successful. An email will also be sent to the organiser and any attendees containing booking information and a Teams meeting link to enable them to join the meeting.

The meeting organiser will also be able to be directed back to the Cloudbooking Portal by clicking on the below link.

Your booking will now be displayed on the bookings table and within the My Bookings section in the menu list.
The booking will also now appear in the Teams Calendar for all attendees who have accepted the meeting.
The name of the room and the location will appear in the calendar invites of all attendees.

Deleting or editing a single booking
To edit a booking, select the booking from the grid, the Edit Room Booking screen will open.
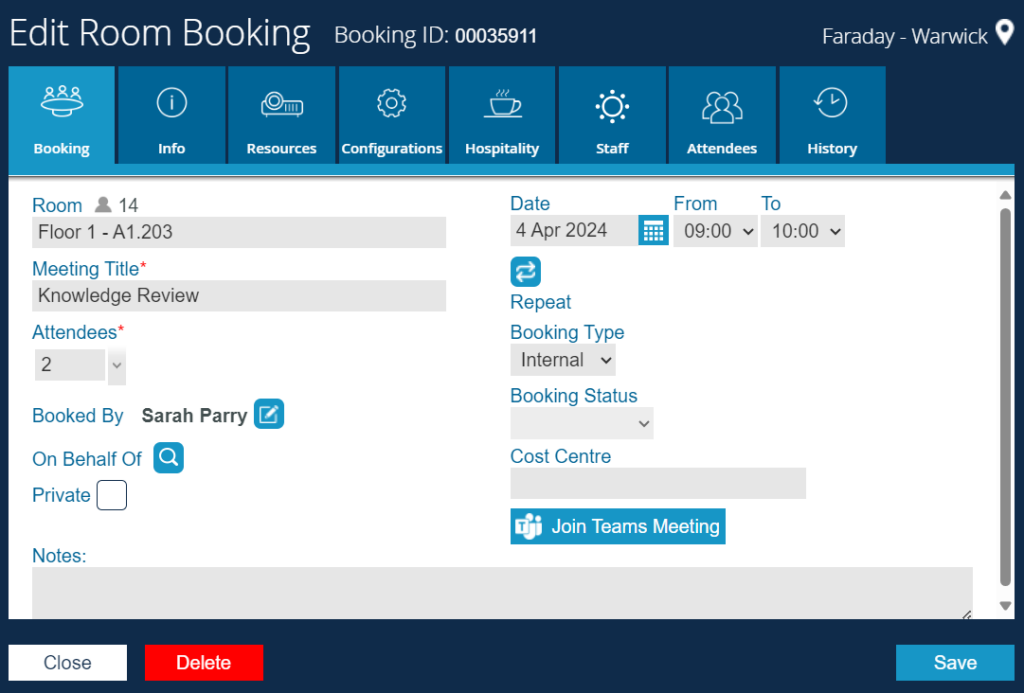
Make your changes as required and click Save.
The organiser and all attendees will receive an email to confirm that the booking has been updated.
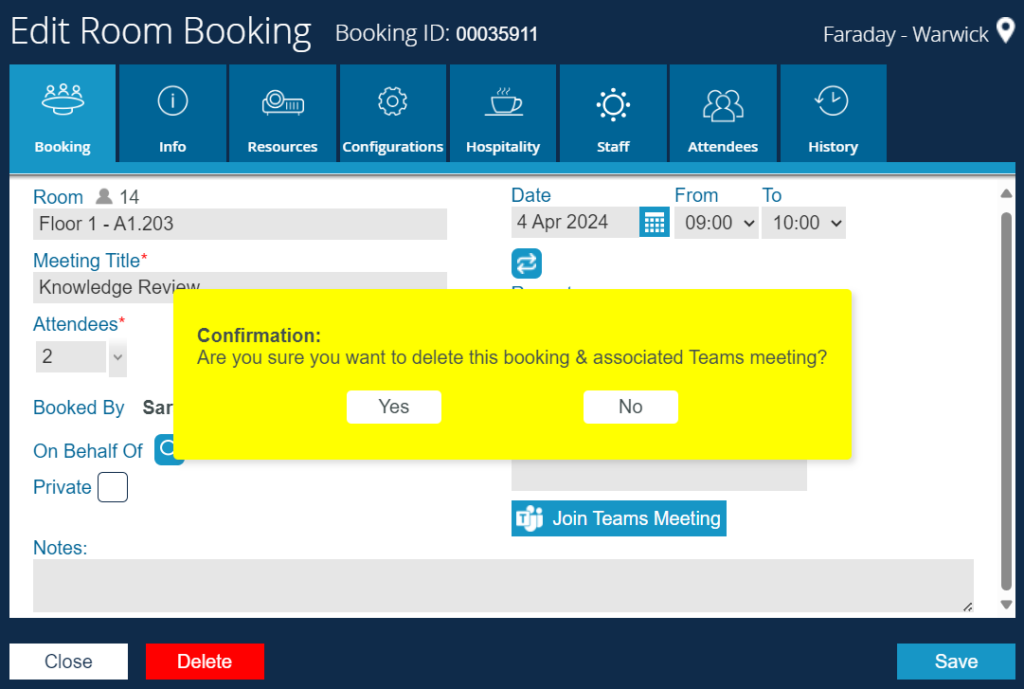
To delete a booking, select Delete from the Edit Room Booking screen. If you click Yes to the following confirmation, the booking will be deleted.
The organiser and all attendees will receive an email to confirm that the booking has been cancelled.
The room reservation will be removed from the Cloudbooking portal, from the user calendar and the calendar of invited attendees.
PLEASE NOTE – If the booking is deleted in Teams/Outlook calendars, ONLY the meeting will be deleted, the room will still be booked. We recommend deleing the booking in the Cloudbooking Portal to remove all.
Making a repeat booking
Select a room to book in the usual way.
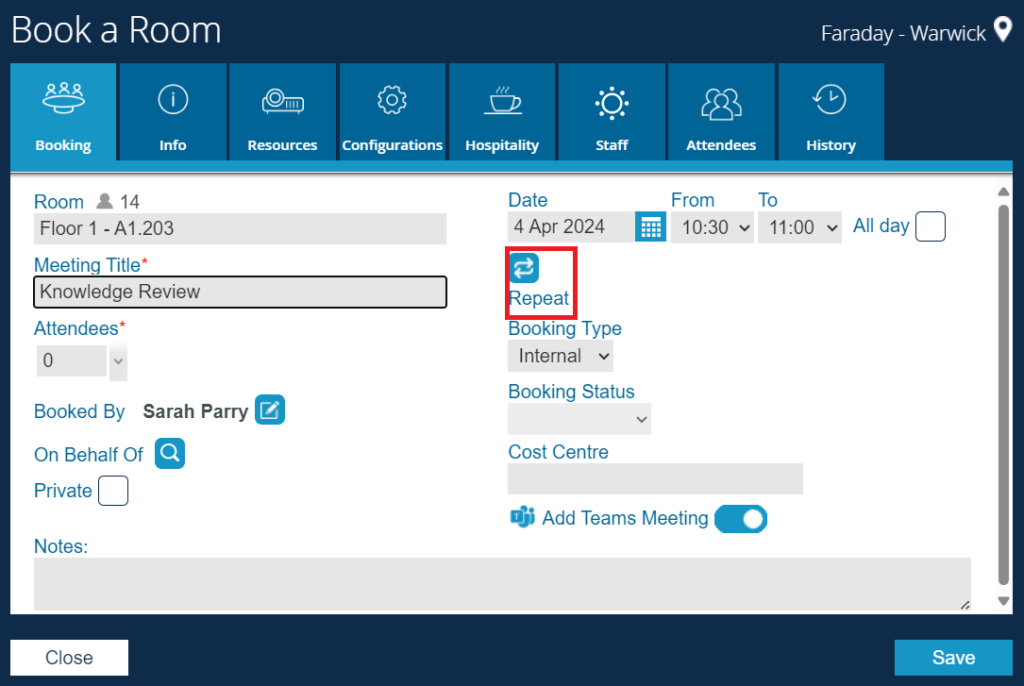
Select your repeat booking preferences and click Save.

All repeat booking occurrences will appear in the My Bookings Screen
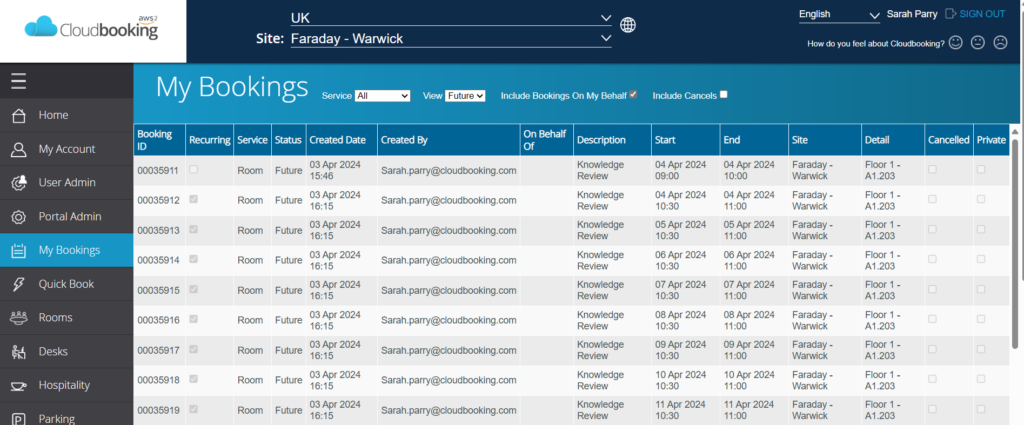
The organiser and attendees will receive an email notification and all booking occurrences will appear in the portal and in the Teams calendar of all attendees. The Teams meeting link will be the same for all occurrences of the booking.
Editing a repeat booking
Select the occurrence you wish to edit or delete from the list in My Bookings or directly in the booking grid and the Edit Room Booking screen will open.
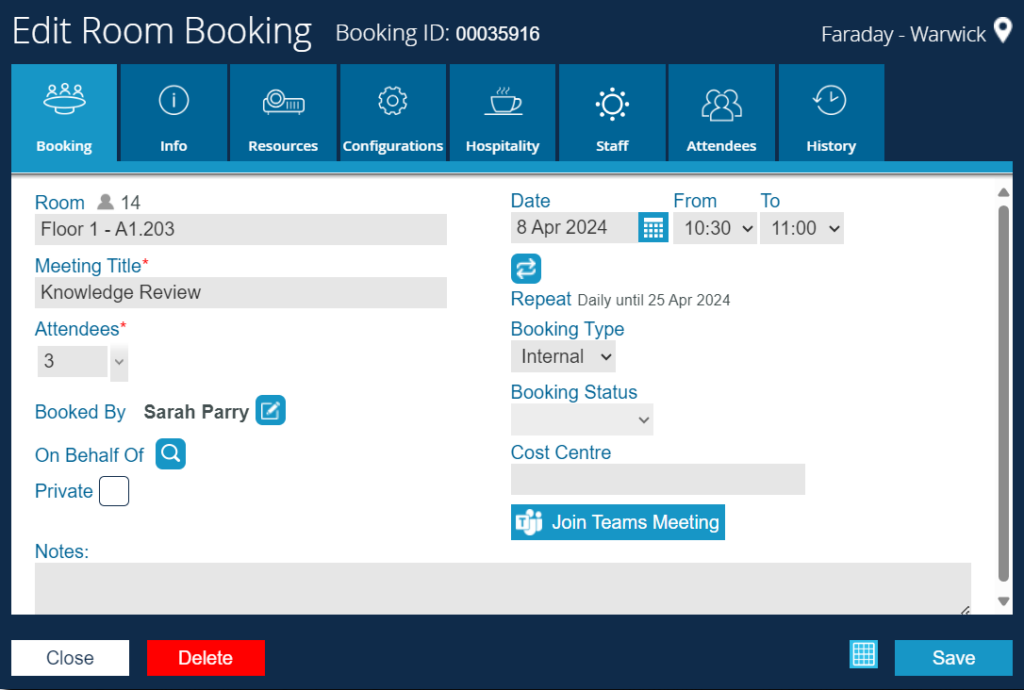
Make the required amendments and click Save.
The organiser and any attendees will receive an update notification and the Teams calendar of all attendees will be updated accordingly.
PLEASE NOTE – making amendments to a repeat booking will update EVERY occurrence of the booking.
Deleting a repeat booking
Select the occurrence you wish to delete from the list in My Bookings or directly in the booking grid and the Edit Room Booking screen will open as before.
Click Delete.
If you click Yes to the following confirmation

The following screen will appear:

Select either the occurrence or the series and the booking will be deleted.
The organiser and any invited attendees will receive an update notification.
The room reservation will be removed from the Cloudbooking portal, from the user calendar of the organiser and the calendars of invited attendees.
PLEASE NOTE – If the booking is deleted in Teams/Outlook calendars, ONLY the meeting will be deleted, the room will sill be booked. We recommend deleting the booking in the Cloudbooking Portal to remove all.