Quick Content links
How to book a room via the booking grid
How to book a room via the floorplan
Adding a floating resource to a booking
Configuring a room using divider doors
Adding hospitality to a booking
How to book a room via the booking grid
Firstly log into your Cloudbooking account via your portal URL.
You will now be on the home screen.
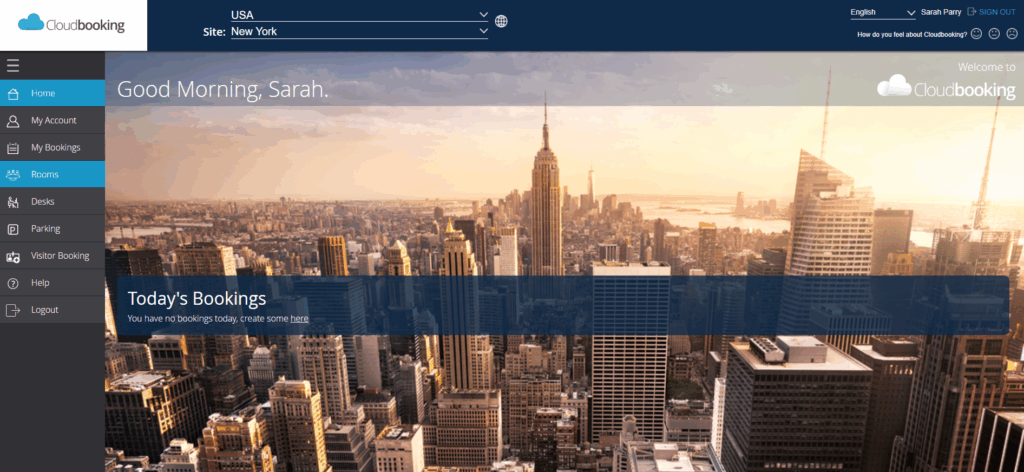
Select the site you want to make your booking in then select Rooms from the menu on the left.

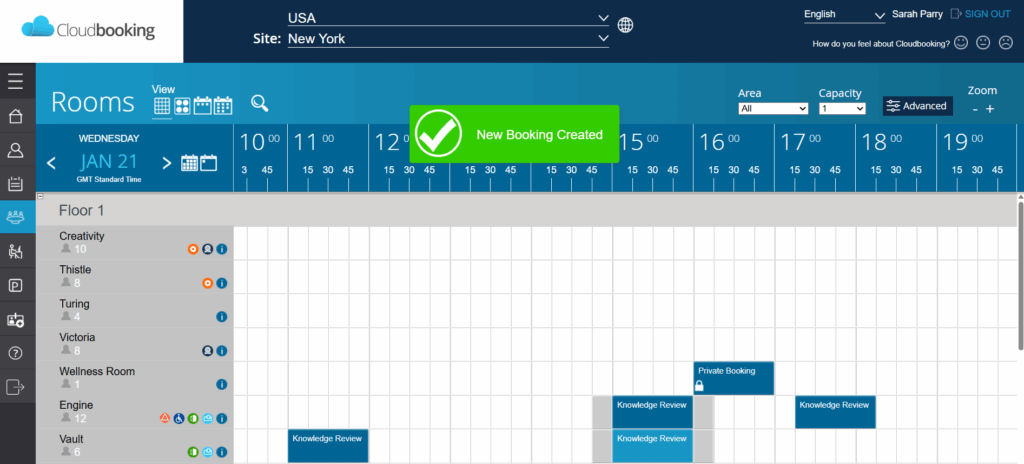
You will now be on the booking table (see below).
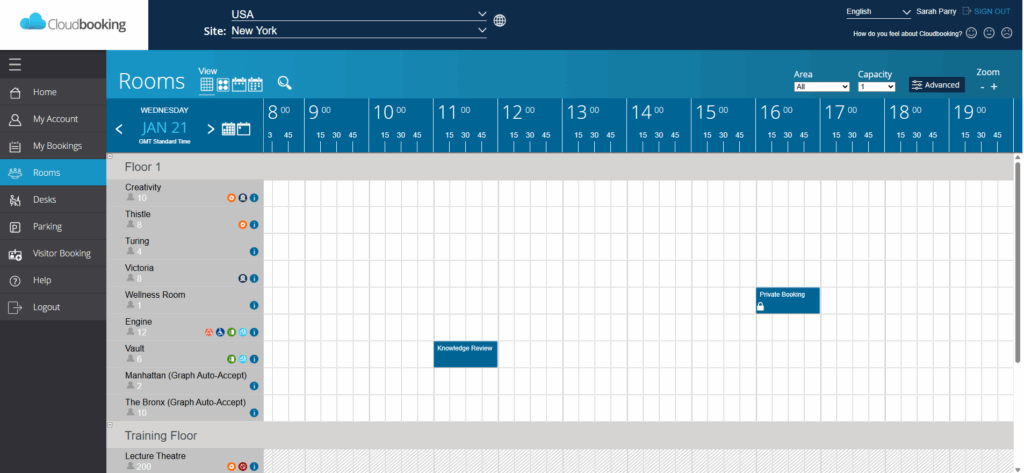
Select the date required (you can also select a preferred floor/area/capacity/ to refine the table) and you can then see the available times and click and drag the slot you want on the table. There is also the option to refine your room selection further by clicking ‘Advanced’
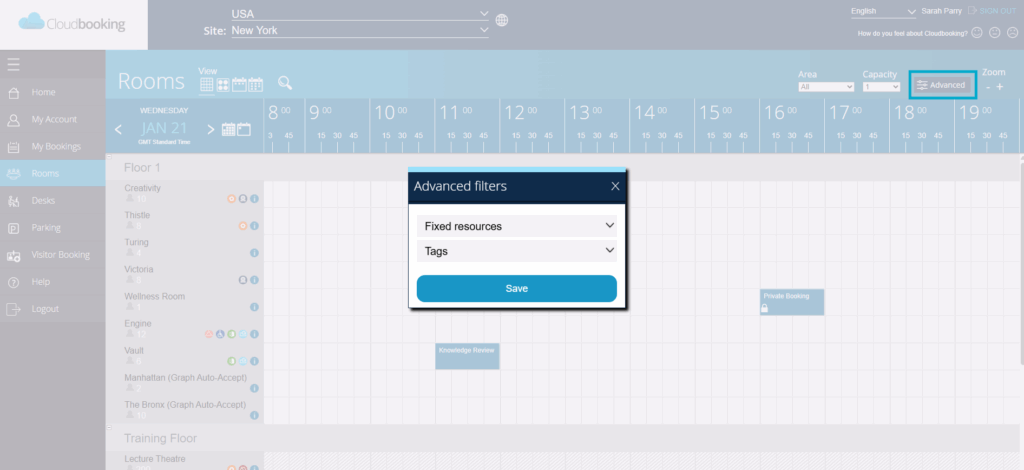
You can choose to further refine your search by using the filters to select only rooms with the fixed resources you require or if a room is tagged as being accessible for wheelchair users.

Add your filters and click ‘Save’
You will now have the ability to book your room, resource, room configurations, hospitality & attendee requirements.
Select a room from the list.
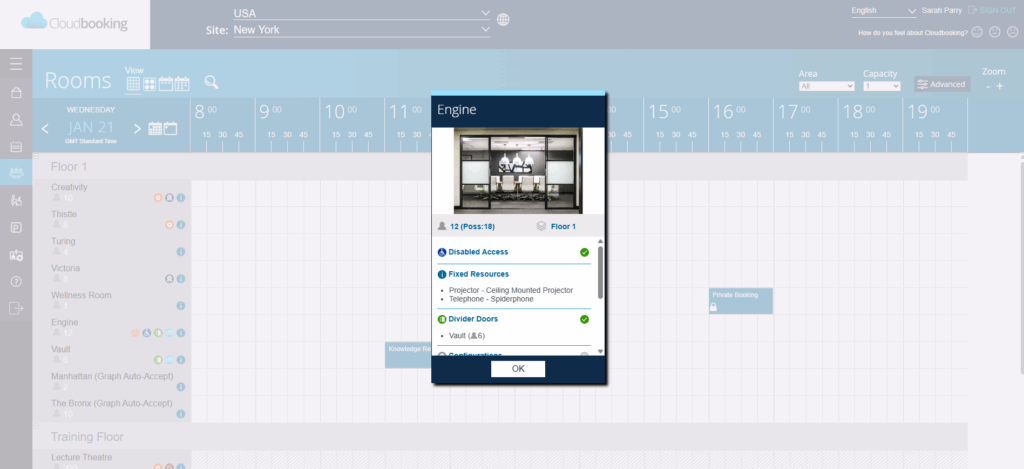
The icons at the side show the features of the room at a glance. If you hover over them with your mouse pointer, the descriptions will appear.

Clicking on the ‘Information’ icon brings up a more detailed description of the room and its features.
Choose your preferred booking timeslot by clicking and dragging along the booking grid, this will open a room booking form for you to complete.
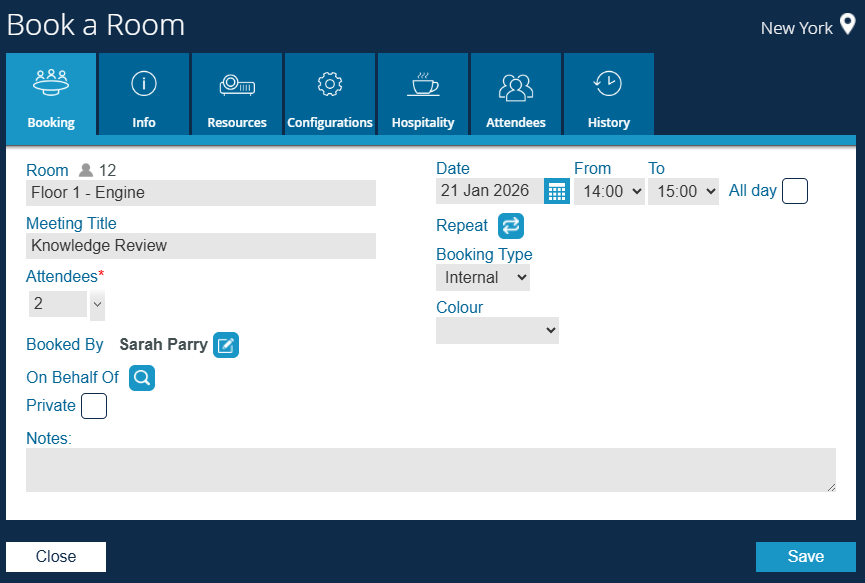
Should you wish to book on behalf of another colleague then select On Behalf Of, search for the colleague, select them from the available list then Save to continue with the rest of the booking.
If you wish to add hospitality or resources then please see Adding a floating resource to a booking or Adding hospitality to a booking.
If your room selection has the option for divider doors, you can manage that here using the configuration tab. For further information, please see Configuring a room using divider doors.
or to continue without adding hospitality, configuration or resources click Save.
Your booking will now show on the bookings table and also within the My Bookings section in the menu list.
How to book a room via the floorplan
After selecting Rooms, if a floorplan is available then you can select the floorplan icon under the View option in the top left.
You will then see the floorplan with available rooms.
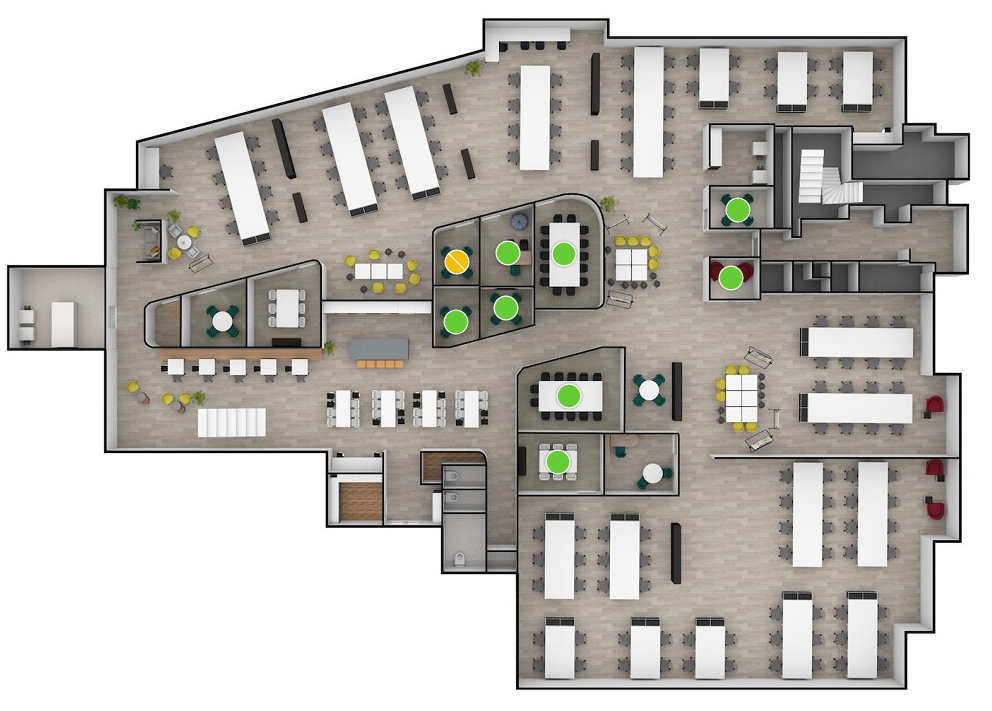
The rooms will be shown as pins, see PIN colours explained for more information on what each colour means.
Selecting a green pin will bring up the Book a Room screen. From there you can complete your booking at outlined in How to book a room via the grid view.
Adding a floating resource to a booking
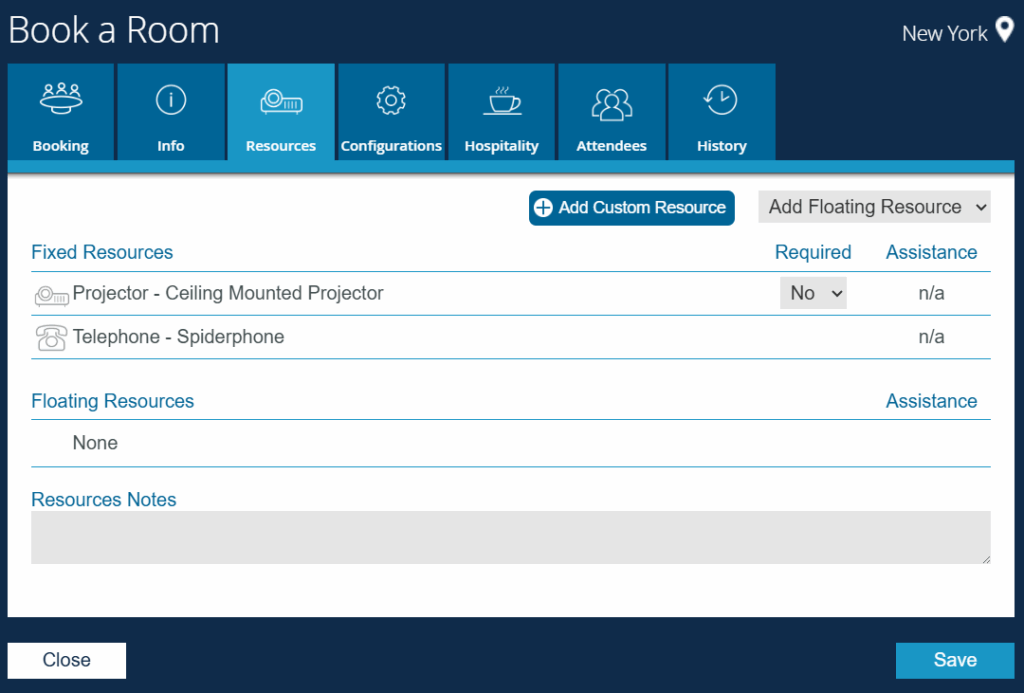
To add a floating resource to your room booking please click on the Resource tab on the Book a Room screen.

This tab will show you all fixed resources and if floating resources are available selecting the drop down for Add Floating Resource will show a list of what is available and allow you to select what you would like. Once you’re happy with your selections select Save to complete the booking.
Configuring a room using divider doors
If available, it is possible to configure your room booking using divider doors to add extra capacity, or for the option of a break out room.
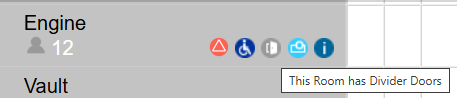
If the room has divider doors as an option, this icon will be displayed.

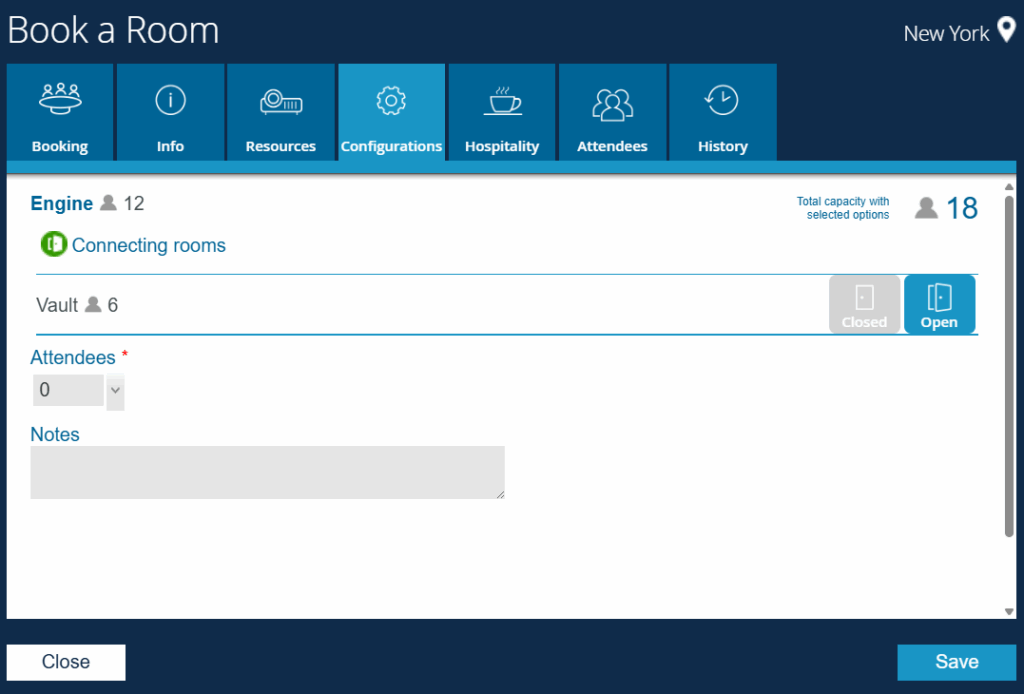
Select the Configurations tab on the room booking form.
The form will show the existing capacity of the room and how much capacity is in the adjoining room that will be accessible with the divider doors open.
This example shows a room capacity of 12 with six places in the adjoining room so if you select for the divider doors to be closed, the capacity will remain at 12
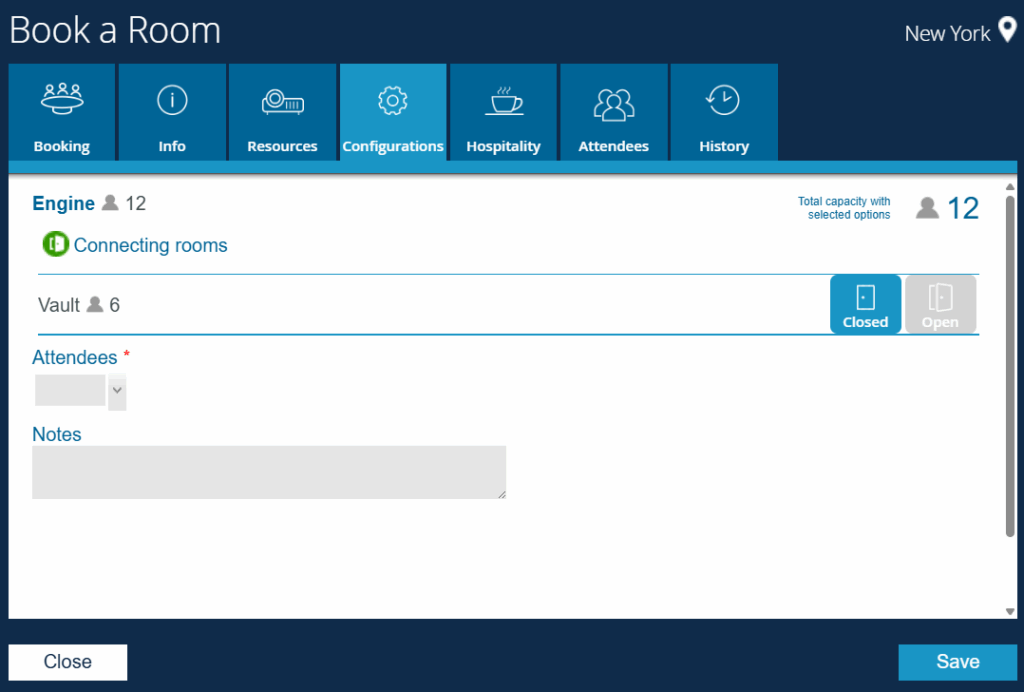
If you choose to have the room configured with the divider doors open, the places from the adjoining room are added and the total capacity of the room now becomes 18.
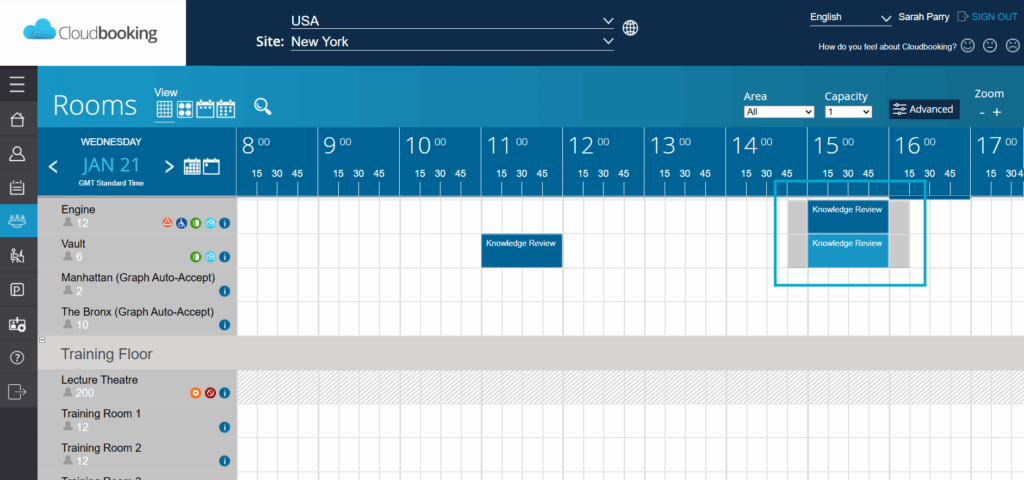
The system automatically books the adjoining room for you, and the booking will be displayed on the grid like this
Adding hospitality to a booking
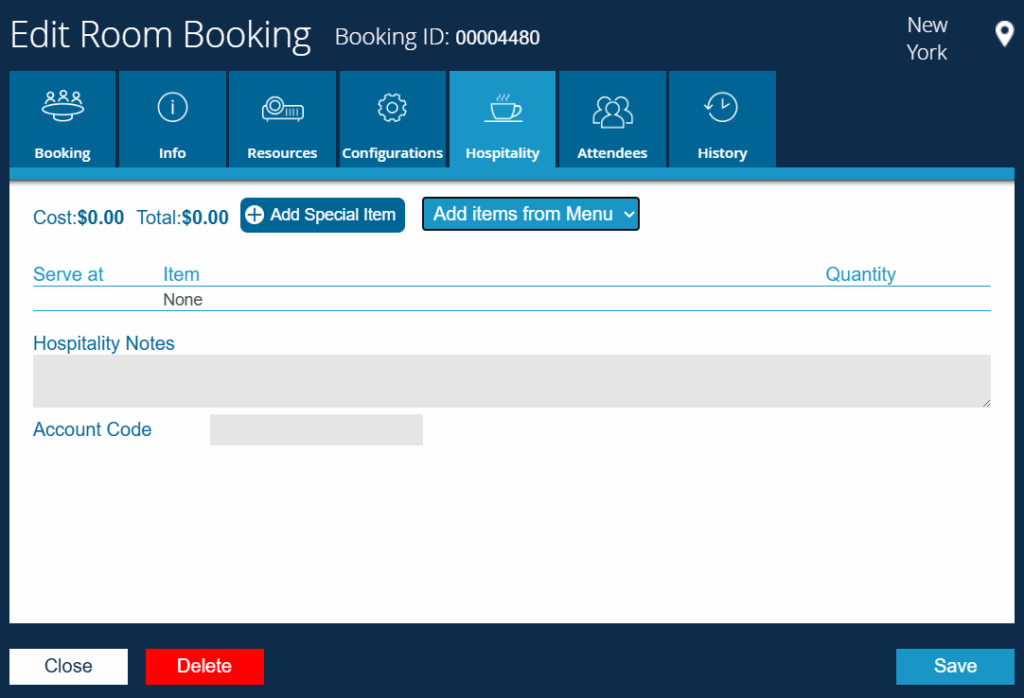
To add hospitality to your booking click on the Hospitality tab on the Book a Room screen.

Select the drop down next to Add items from Menu and select the menu you wish to add items from.
You can then select the quantities of items needed.
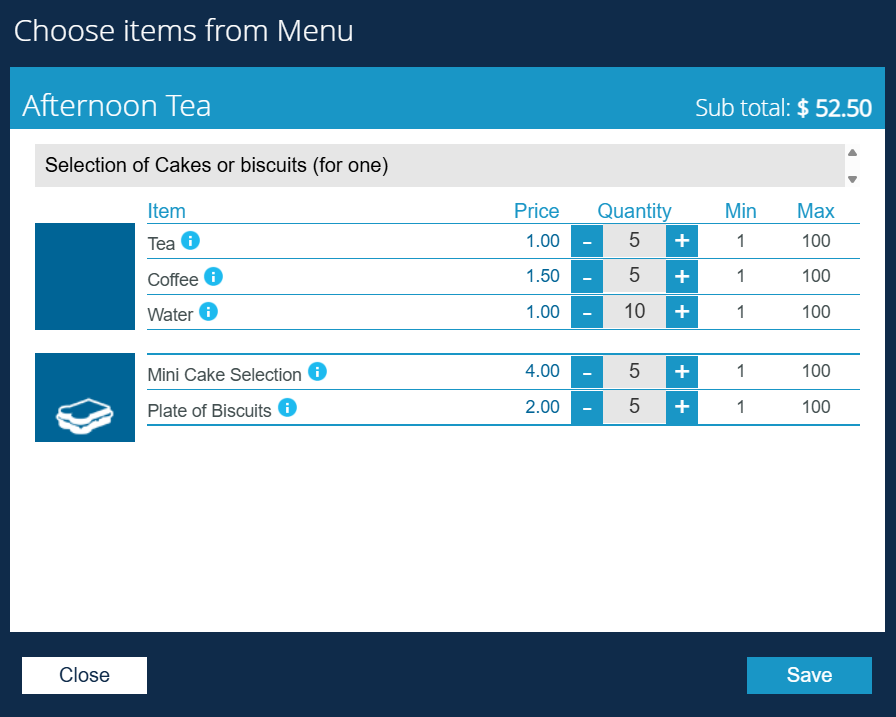
Select Save to add the items to the order.
Once added you will see the items on the hospitality screen. From there you can decide what time you would like the items to be delivered during the booking by selecting the drop down under Serve at for each line item.
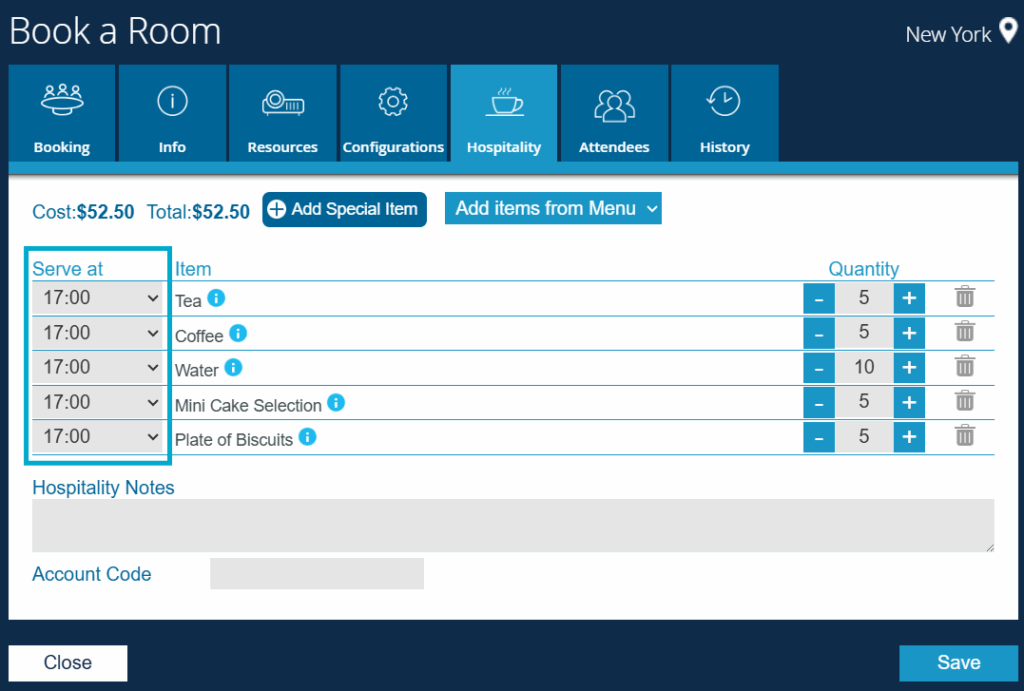
Selecting Save will then complete the booking.