Download the Cloudbooking Check-In app from the app store:
Cloudbooking Check-in App for iOS:
htps://apps.apple.com/gb/app/cloudbooking-check-in/id6779280570
Cloudbooking Check-In App for Android:
htps://play.google.com/store/apps/details?id=com.cloudbooking.cb.checkin&hl=en_GB
Guided Access restricts the iPad to the Cloudbooking Check-In App and prevents users from switching to other applications.
Quick Content Links
Step 1 – Prevent the iPad from sleeping
Step 2 – Enable guided access
Step 3 – Lock the iPad to the CBCheck-In app
Exit guided access
If you need further assistance, please email hello@cloudbooking.com
📵 Step 1 – Prevent the iPad from sleeping
Open Settings.
Select Display & Brightness.
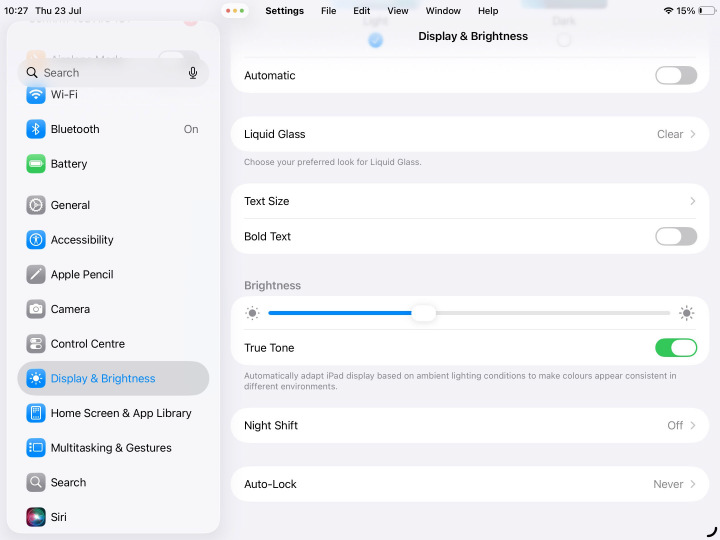
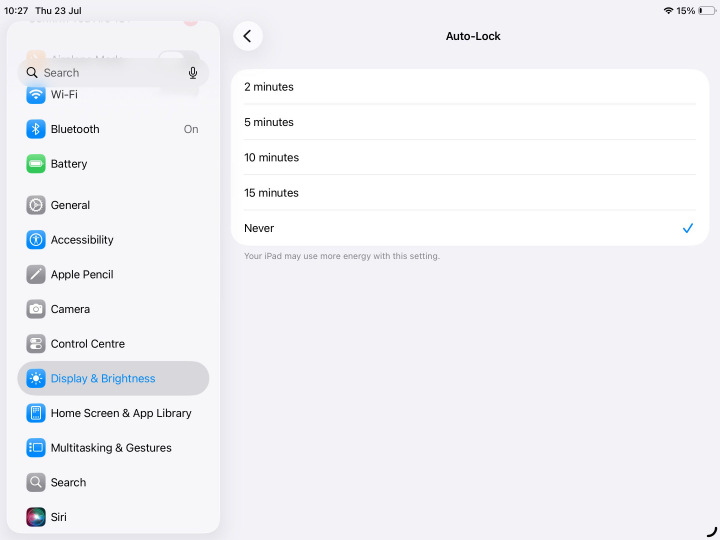
Select Auto-Lock.
Choose Never.
🔒 Step 2 – Enable Guided Access
Open Settings.
Select Accessibility.
Scroll down and select Guided Access.
Turn Guided Access on.
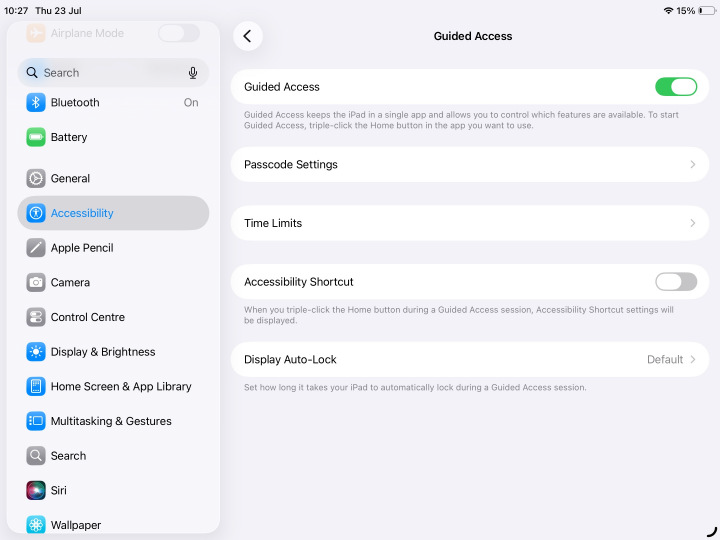
Set Display Auto-Lock (if available) to Never.
Select Passcode Settings.
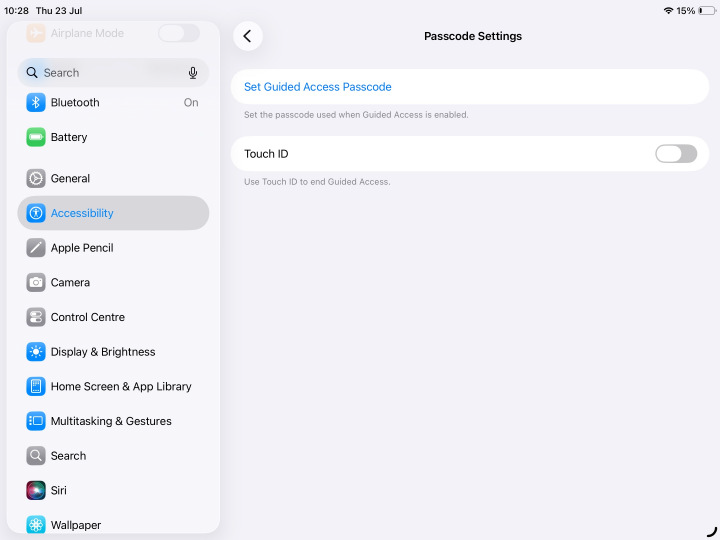
Select Set Guided Access Passcode.
Create a memorable passcode and store it securely.
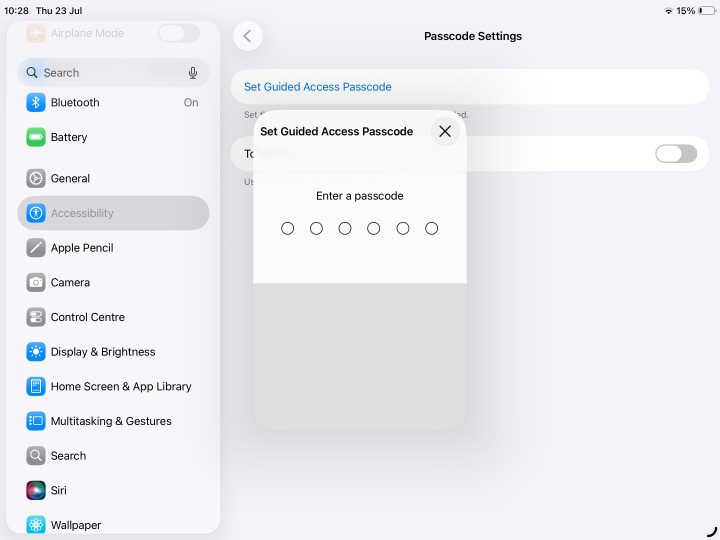
📌 Important: If the Guided Access passcode is forgotten, additional steps may be required to regain control of the device.
📱 Step 3 – Lock the iPad to the Cloudbooking Check-In app
Open the Cloudbooking Check-In App.
Triple-click the Top Button (or Home Button on older iPads).
Select Guided Access.
Tap Start.
The iPad is now locked to the Cloudbooking Check-In App.
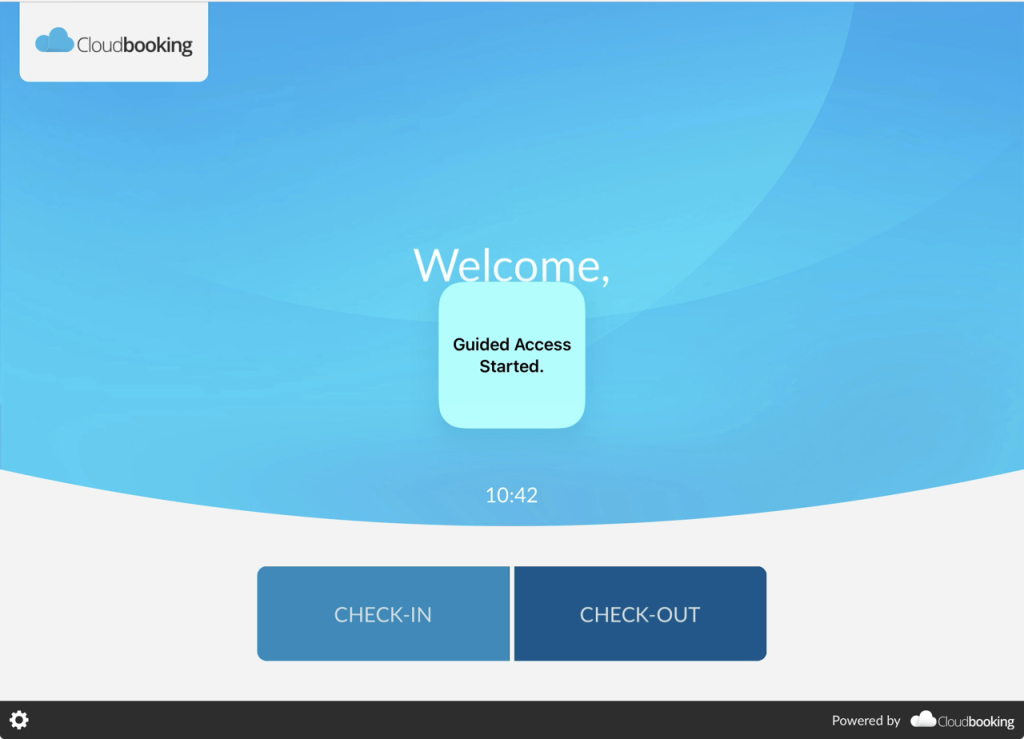
🔓 Exit Guided Access
Triple-click the device button.
Enter the Guided Access passcode.
Select End.
Back to top of page