Cloudbooking Sync Service enables users to book rooms through the Cloudbooking portal or directly via their Outlook/Exchange calendar, with all bookings automatically syncing between systems. Rooms can be reserved using the booking grid or floorplan (where available in your portal), providing flexibility when creating and managing bookings.
Quick content links
📅Booking a room
🔵Using Cloudbooking
Using the booking grid
Using the floorplan
Pin colours explained
🟣 Using Outlook / Exchange
Using Outlook (Desktop or Web)
✏️ Edit or cancel a booking
🔵 Using Cloudbooking
Edit a booking
Cancel a booking
🟣 Using Outlook / Exchange
Edit a booking
Cancel a booking
📅 Book on behalf of another user
🔵 Using Cloudbooking
🟣 Using Outlook / Exchange
Making a booking as a delegate
🔁 Making Repeat (Recurring) Bookings
🔵Using Cloudbooking
🟣 Using Outlook / Exchange
💻 Booking a Teams meeting
🔵 Using Cloudbooking
Book a Teams meeting
🔵 Using Cloudbooking
Joining a Teams Meeting (Cloudbooking Portal)
🟣 Using Outlook / Exchange
📅 Set Up Delegate Access
Outlook (Windows Desktop)
Outlook (Mac Desktop)
Outlook (Web / OWA)
ℹ️ CBSync considerations and known behaviours
❓Frequently asked questions
If you need further assistance, please email hello@cloudbooking.com
📅 Booking a room
🔵 Using Cloudbooking
You can book a room in Cloudbooking using either the grid view or the floorplan view. Both provide the same functionality—the choice depends on your preference.
🔲 Using the booking grid
Log in to Cloudbooking using your portal URL to access the home screen.
Select the site for your booking, then choose and select Rooms from the left hand menu.

You will see the booking grid. Select the required date and use the filters (floor, area, capacity) to refine the results.

You can refine your room search further by selecting Advanced and filtering by required resources or accessibility.


You can also view room features on the left hand side of the grid, identified by the coloured icons below each room. You can hover over icons to see descriptions of each feature.

Click the Information icon for full room details.

On the grid, you can book a room by clicking and dragging on your desired timeslot to open the booking screen.
Within the booking screen, you can enter meeting details such as meeting title, number of attendees and more.

If the information you have provided on the booking form is sufficient at this point, click Save to complete your booking.
✅ Your booking will:
- Appear in My Bookings
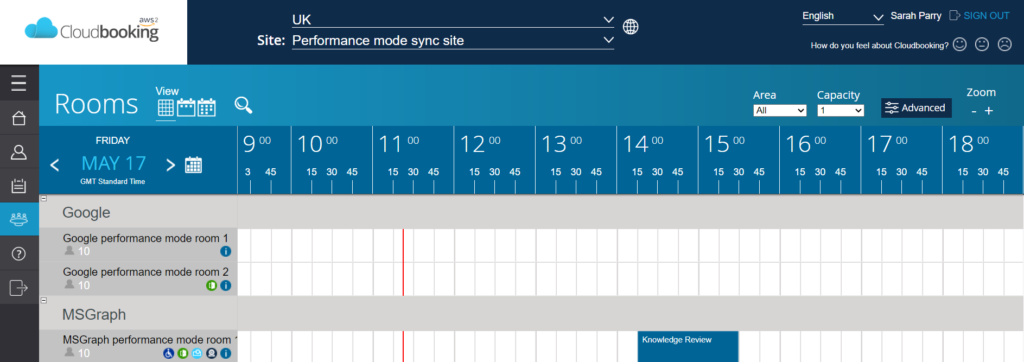
- Display on the booking grid
- Be added to your Outlook calendar
- Be added to the room calendar
📧 You will also receive:
- A booking confirmation email
- An acceptance from the room mailbox
📌Please note: if multiple users attempt to book the same room for the same time slot, the system will allocate the booking to one user. If your booking is not successful, you will be notified.
🗺️ Using the Floorplan
If a floorplan is available, you can book visually.
After selecting Rooms, if a floorplan is available, click the floorplan icon under View in the top left.

in the top right, you can select an area and a date and time for your booking.
The floorplan will update accordingly, based on your selections.

Available rooms appear as coloured pins. Click a green pin to open the Booking form and complete your booking.

📌 All booking features available in the grid are also available in the floorplan.
Please refer to these sections of the guide for further information.
If the information you have provided on the booking form is sufficient at this point, click Save to complete your booking.
✅ Your booking will:
- Appear in My Bookings
- Display on the grid
- Show as a blue pin on the floorplan
- Sync to Outlook and the room calendar
🟢 Pin colours explained
In the floorplan view, rooms and desks are shown as coloured pins, indicating their availability status.

🟣 Using Outlook / Exchange
You can also book a room directly using your Outlook calendar. This is useful if you prefer to schedule meetings alongside invites and attendees.
📅 Using Outlook (Desktop or Web)
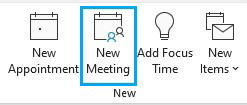
Open your Outlook calendar and select New Meeting.
Add your meeting details:
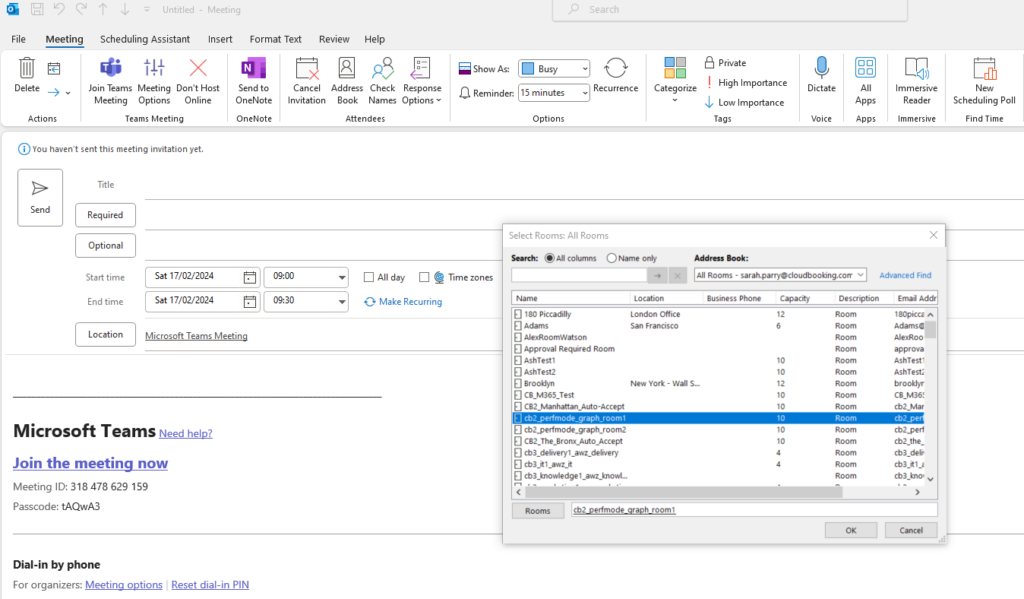
- Enter a meeting title
- Add required attendees
- Select the date and time
Add a room:
- Use the Location field to search for and select a room
The selected room will be added as an attendee to the meeting
The room must be configured to sync with Cloudbooking
Once all details are complete, click Send
✅ Your booking will:
- Appear in your Outlook calendar
- Reserve the selected room
- Be visible in the Cloudbooking Portal


📧 You will receive:
- A meeting confirmation
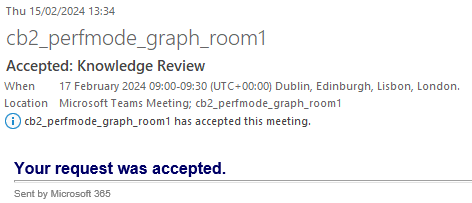
- An acceptance notification from the room mailbox
✏️ Edit or Cancel a Booking
If your plans change, you can update or cancel your booking in either Cloudbooking or Outlook.
🔵 Using Cloudbooking
✏️ Edit a Booking
Select the booking from your My Bookings list to open the Edit Room Booking form.

Make your changes and click Save.
✅ Your booking will:
- Be updated in My Bookings
- Be updated in your Outlook calendar
- Be updated in the room calendar
📧 You will receive confirmation that your changes were successful.
📌 To change to a different room, you must cancel the existing booking and create a new one.
❌ Cancel a Booking
Open the booking via My Bookings.
Select Delete.
Confirm by selecting Yes.

✅ Your booking will:
- Move to Cancelled (instead of Upcoming)
- Be removed from your calendar
- Be removed from the room calendar
📧 You will receive confirmation that your booking has been cancelled
🟣 Using Outlook / Exchange
✏️ Edit a Booking
Open your Outlook calendar
Select the meeting you want to update
Make your changes:
- Date or time
- Attendees
- Room (if required)
Click Send Update
✅ Your booking will:
- Be updated in your calendar
- Update the room reservation
- Be reflected in Cloudbooking
📧 Updated meeting notifications will be sent to attendees and the room
❌ Cancel a Booking
Open the meeting in your calendar
Select Cancel Meeting
Send the cancellation
✅ Your booking will:
- Be removed from your calendar
- Release the room
- Be removed from Cloudbooking
📧 A cancellation notice will be sent to attendees and the room
🔁 Repeat (Recurring) Bookings
If your booking is part of a recurring series, you can edit or cancel:
- A single occurrence, or
- The entire series
👉 Detailed steps for managing recurring bookings are covered in Repeat (Recurring) Bookings
👤 Book on Behalf of Another User
If you need to create a booking for a colleague, you can do this directly in Cloudbooking.
🔵 Using Cloudbooking
Start creating your booking as usual.

In the booking form:
Select On Behalf Of.
Search for the user and select them from the list.

The selected user will now appear in the On Behalf Of field.

Complete the remaining booking details and click Save
✅ The booking will:
- Be created in your colleague’s name
- Appear in their calendar
- Be visible in the Cloudbooking Portal
- Reserve the selected room
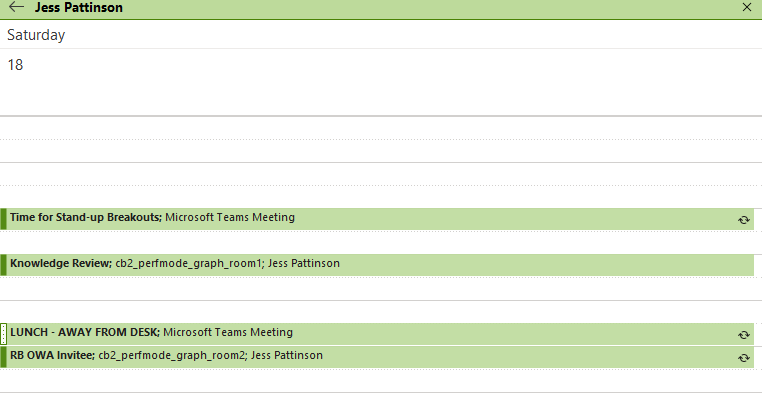
📧 Notifications will be sent to the relevant attendees and room mailbox
📌 Your name will not appear on the booking.
📌 Bookings can be edited or cancelled at any time via the Cloudbooking Portal or calendar
🟣 Using Outlook / Exchange
To book on behalf of another user in Outlook, you must first have delegate access to their calendar.
📌 See Set Up Delegate Access for instructions on how to configure this.
📅 Make a Booking as a Delegate
Open the calendar of the user you are booking for
Create a New Meeting
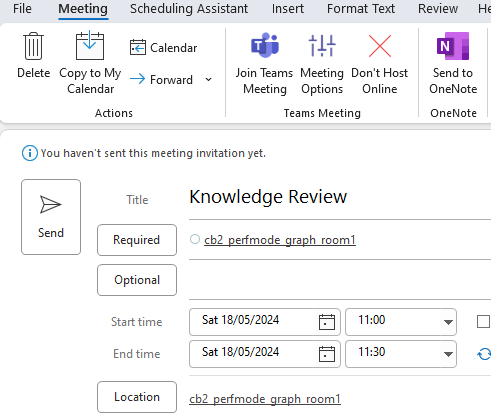
Add meeting details:
- Enter a title
- Select date and time
- Add any required attendees
Add a room:
- Use the Location field
- Select the room you want to book
Click Send
✅ The booking will:
- Be created in the selected user’s calendar
- Reserve the selected room
- Be visible in Cloudbooking
📧 Notifications will be sent to:
- The room mailbox
- Any attendees added to the meeting
📌 Your name will not appear on the booking.
📌 Bookings can be edited or cancelled via Outlook or the Cloudbooking Portal.
🔁 Making Repeat (Recurring) Bookings
If you need to book a room for a regular meeting, you can create a recurring booking in Outlook that will sync with Cloudbooking.
🔵 Using Cloudbooking
Start creating a booking as usual (see Book a Room)
In the booking form:
Select the Repeat icon
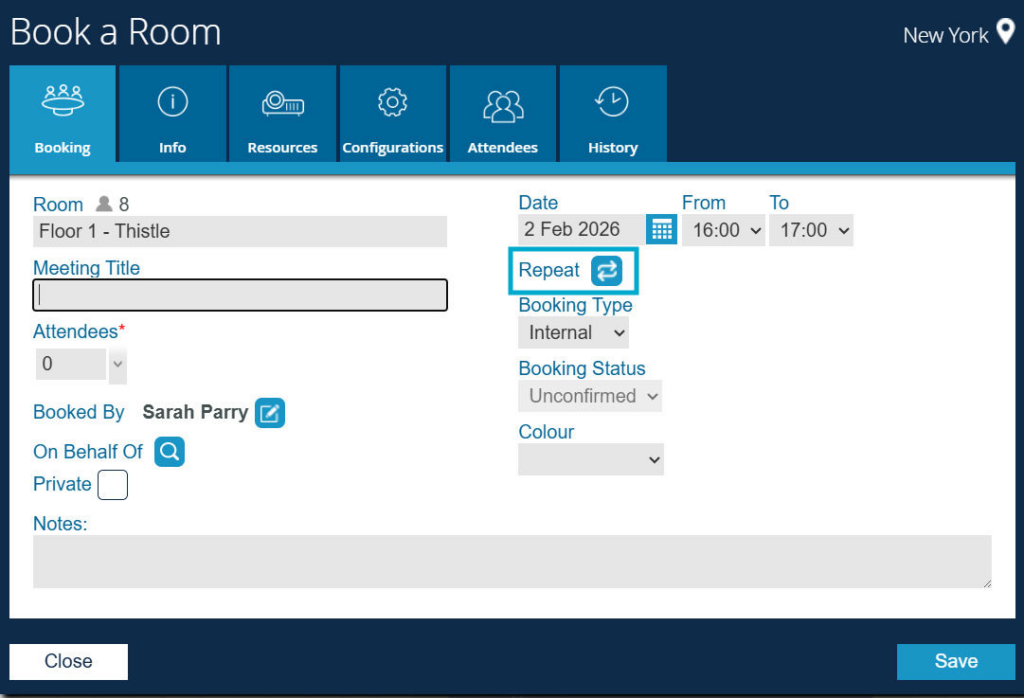
Choose your recurrence pattern:
- Daily
- Weekly
- Monthly
- Or a custom schedule
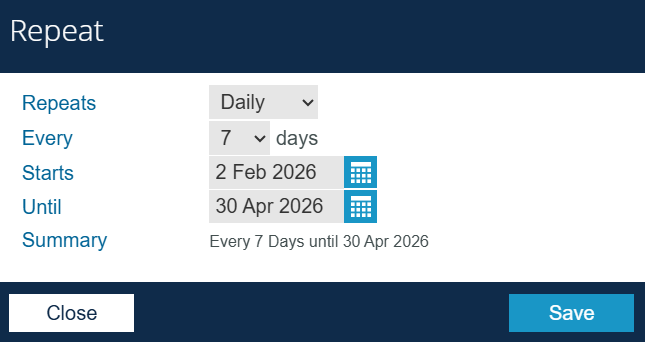
Click Save to confirm your recurrence
Complete the booking and click Save
✅ Your booking will:
- Be created as a series of bookings
- Appear in My Bookings and on the grid (with a repeat icon)
- Be added to your Outlook calendar and the room calendar
📧 You will receive:
An acceptance from the room mailbox
A booking confirmation
🟣 Using Outlook / Exchange
🔁 Create a Recurring Meeting
Open your Outlook calendar and select New Meeting
Add your meeting details:
- Title
- Attendees
- Room (via Location)
- Select Recurrence
Choose your pattern:
- Daily, weekly, monthly, or custom
- Click OK, then select Send
✅ Your booking will:
- Be created as a recurring meeting series
- Reserve the selected room for each occurrence
- Be visible in Cloudbooking
📧 Notifications will be sent to attendees and the room mailbox
✏️ Editing or Cancelling a Repeat Booking
You can update or cancel:
- A single occurrence, or
- The entire series
👉 See Edit or Cancel a Booking for step-by-step instructions.
💻 Book a Teams Meeting
You can add a Microsoft Teams meeting to your booking in either Cloudbooking or Outlook. This will automatically include a Teams meeting link for attendees.
🔵 Using Cloudbooking
Start creating a booking as usual (see Book a Room)
In the booking form:
Toggle Add Teams Meeting to on
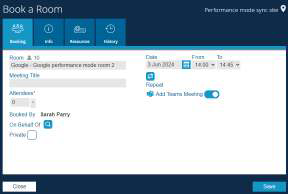
Complete your booking details and click Save
✅ Your booking will:
Include a Teams meeting link
- Appear in Cloudbooking and all relevant calendars
- Reserve the selected room
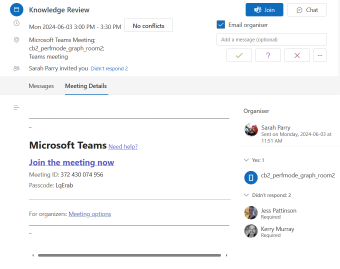
📧 Attendees will receive:
- A meeting invitation with a Teams link
- A room acceptance confirmation
🟣 Using Outlook / Exchange
Open your Outlook calendar and select New Meeting
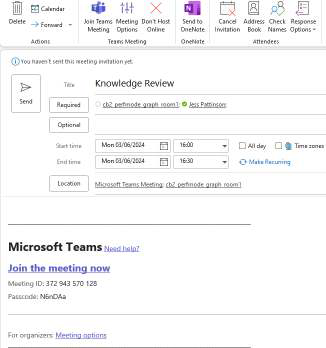
Select Teams Meeting from the toolbar
Add your meeting details:
- Title
- Attendees
- Room (via Location)
Click Send
✅ Your booking will:
- Include a Teams meeting link
- Reserve the selected room
- Be visible in Cloudbooking
📧 Invitations will be sent to all attendees and the room
💻 Joining a Teams Meeting (Cloudbooking Portal)
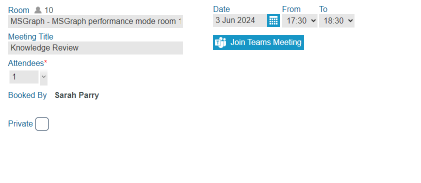
Bookings created as Teams meetings display a Teams icon in the Cloudbooking portal.
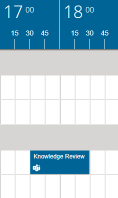
To join:
Open the booking in Cloudbooking
Select Join Teams Meeting
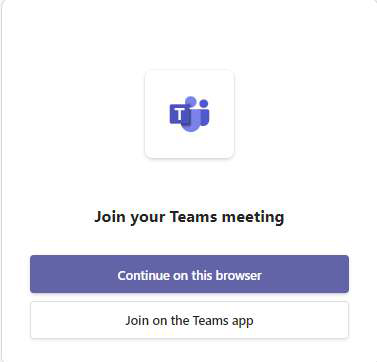
Choose to:
- Continue in your browser, or
- Open the Teams app
📅 Set Up Delegate Access
To book on behalf of another user in Outlook, you must first be granted delegate access to their calendar.
🟣 Outlook (Windows Desktop)
Open Outlook and select File from the top menu
Go to Account Settings → Delegate Access
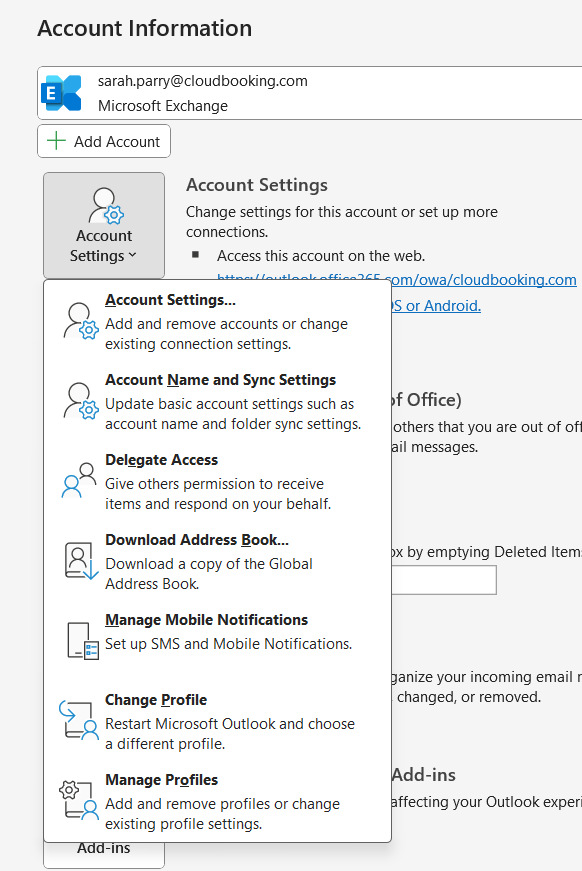
Click Add and search for the user you want to assign as a delegate
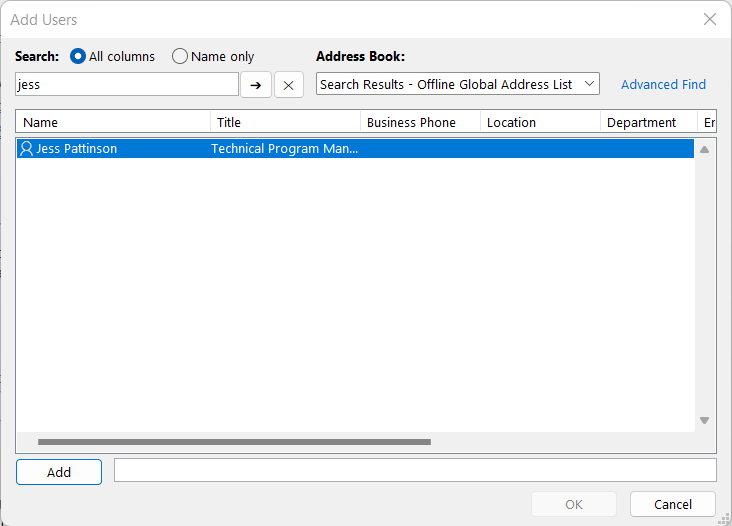
Select the user and click Add, then OK
Choose the appropriate permission level:
- Editor (recommended for booking on behalf)
- Other permission levels are available via the dropdown
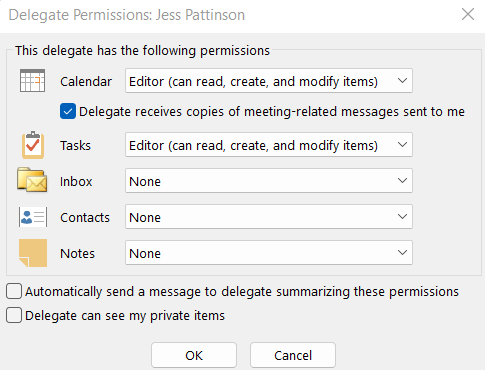
Click OK to confirm.
✅ The delegate will:
- Receive responses to meeting requests they create
- Be able to create and manage bookings on your behalf
🍏 Outlook (Mac Desktop)
Open Outlook and switch to Calendar view
Select your calendar, then go to Account Settings
Choose Delegation & Sharing
Click + and search for the user
Select the appropriate permissions using the dropdown options
Click OK, then Done
✅ To remove a delegate:
- Select the user
- Click the – (minus) button
🌐 Outlook (Web / OWA)
Open your calendar in Outlook Web
Select Share from the top menu
Search for the user you want to add
Select Delegate from the permissions dropdown
(Optional) Enable access to private items if required
Click Share
✅ The delegate will now appear in your shared calendar list
✅ To remove a delegate:
- Select the user
- Click Remove
ℹ️ CBSync considerations and known behaviours
The following information describes specific CBSync system behaviours and configuration requirements that administrators and support teams should be aware of.
Room Configuration Requirements
To ensure Sync operates correctly, room configurations in Cloudbooking and Exchange must be identical.
Service Hours
Bookings are subject to the service hours configured for the room and site.
Maximum Notice Period
Bookings cannot be created beyond the maximum notice period configured for the site or room.
Approval Processes
Depending on room configuration, bookings may be subject to automatic approval, manual approval, or customised approval workflows.
Exchange Limitations
Exchange does not support creating or updating bookings that are entirely in the past.
Cancellation reasons entered in Exchange are not passed to Cloudbooking.
Notification Behaviour
Moving a booking between rooms may generate Exchange cancellation notifications.
Booking updates caused by early check-in, curtailment, or auto-curtailment generate Cloudbooking update notifications.
OBO booking creators are visible in Cloudbooking but not in Outlook.
Recurrence Limits
Yearly recurring bookings are supported for up to four years in advance.
Auto Curtail
Auto Curtail is currently not supported for Sync rooms.
Cloudbooking Screens
Cloudbooking Screens are currently not supported for Sync rooms.
❓Frequently asked questions
Why must room settings match between Cloudbooking and Exchange?
To ensure Sync functions correctly, room configurations in the Cloudbooking Portal must match the corresponding room configuration in Exchange.
Differences between the two systems may result in unexpected booking behaviour or synchronisation issues.
What happens if I move a booking from one room to another?
When a booking is moved to a different room, Exchange treats the change as a cancellation of the original booking and the creation of a new booking.
As a result:
The organiser may receive a cancellation notification from Exchange for the original booking.
A new booking is created for the selected room.
The original booking record remains available within Cloudbooking.
For the best experience, ensure room configurations are aligned between Cloudbooking and Exchange.
Can I create or edit bookings in the past?
No. Exchange does not allow bookings with start and end times that have already passed to be created or modified. This behaviour applies regardless of any Cloudbooking permissions that may allow access to historical bookings.
What happens when a recurring booking is cancelled?
If a recurring booking series is cancelled or deleted, any occurrences that have already taken place remain in the booking history.
The organiser and any configured notification recipients will receive booking cancellation emails from Cloudbooking.
Can I edit the details of past bookings?
No. The Edit Past Booking Details permission is not available for Sync users.
Will cancellation reasons entered in Exchange appear in Cloudbooking?
No. If a cancellation reason is entered in Exchange, it is not passed to Cloudbooking.
However, Cloudbooking audit logs will show that the booking was cancelled in Exchange.