It is possible to book rooms that are available on Cloudbooking via the Outlook calendar removing the need to log into the portal separately.
Quick Content links
Making a booking via outlook
Editing a booking
Cancelling a booking
Making a repeat booking
Editing a repeat booking
Cancelling a repeat booking
Making a booking via Outlook
PLEASE NOTE: In order for the your booking to be made you MUST have a Cloudbooking account using the email address linked to your Outlook calendar.
Go to your Outlook calendar,
Open a meeting invite and add your meeting title, time and date and attendees. PLEASE NOTE: You must create a meeting invite NOT an appointment.

You will then select a room as if you were inviting an attendee. Clicking Required will bring up a list of people and rooms available. You can also add the room by selecting Location to show a list of the available rooms.
Give your meeting a title, invite the room you wish to book from the list and add other attendees and details as required.
You can check the availability of the room by viewing its calendar as you would for a meeting attendee.

The room will appear in the list of attendees and in the Location field, complete all other details and click Send.

You will receive an email confirmation that the meeting request has been accepted by your selected room.
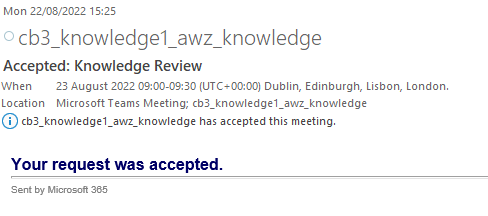
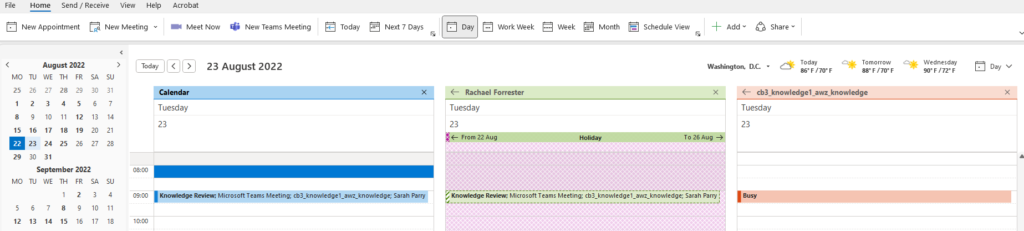
The booking will appear in your outlook calendar and the calendar for the selected room.
Editing a booking
Open the booking in your Outlook calendar.
Click The entire series to make changes to all occurrences or Just this one to edit just one occurrence.

Make your changes as required and click Send Update
You will receive an email confirmation and the Outlook calendar will be updated.
Cancelling a booking
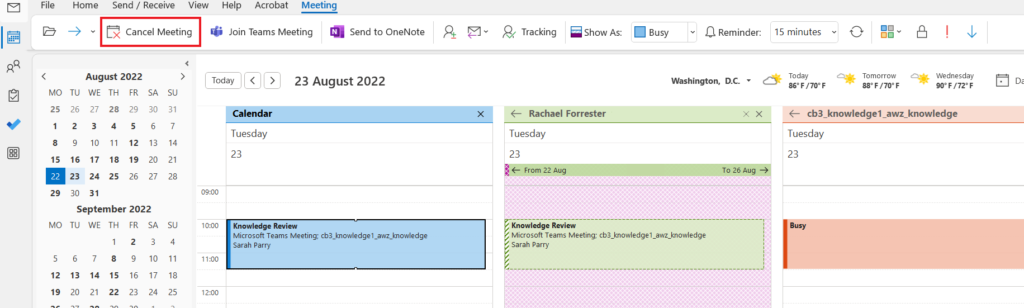
Select the booking in your Outlook calendar.
Either right click on the meeting and select cancel meeting or choose Cancel Meeting from the top toolbar.
Click Send Cancellation
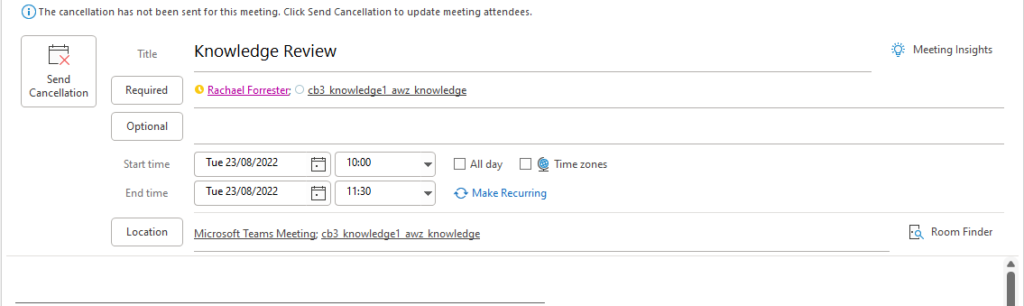
The meeting will then be removed from your Outlook calendar and any attendees will be notified.
If you wish to cancel the room booking but not the meeting, simply remove the room as you would an attendee by deleting them from Required and clicking Send Update. The meeting will remain in place but the room booking will be cancelled and the room will now be available for others to book.
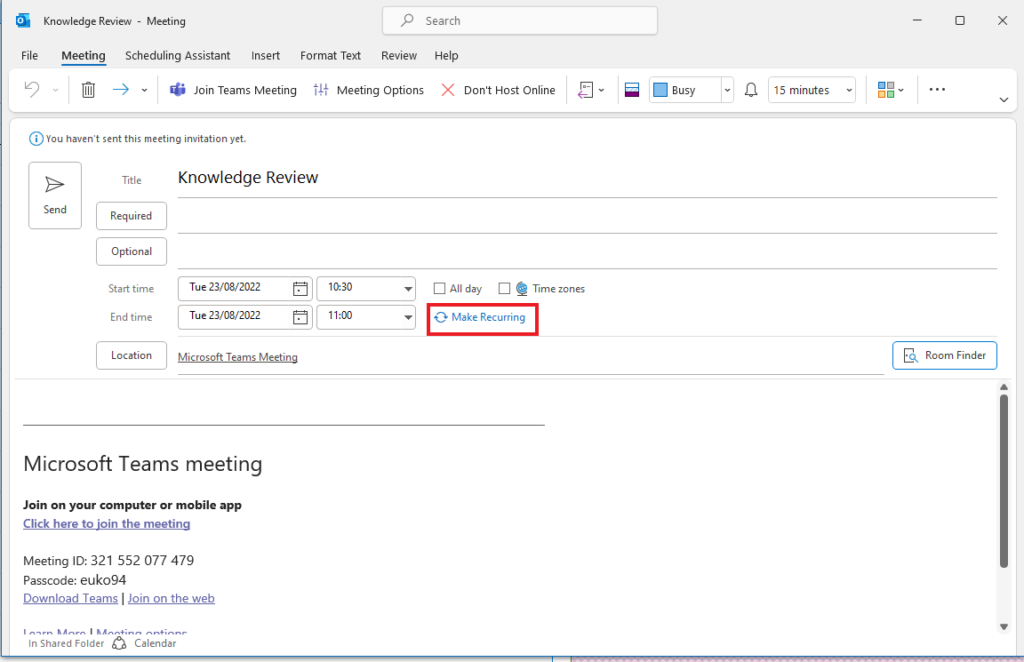
Making a repeat booking
When creating your meeting invite, select Make Recurring.
The following window will open:
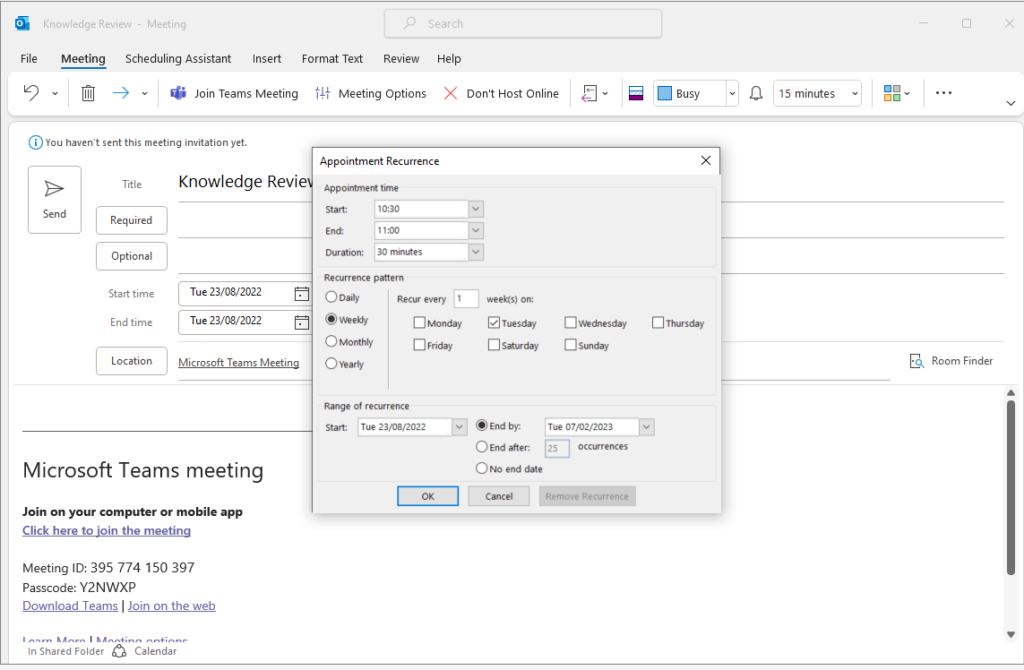
Make your selections and click OK
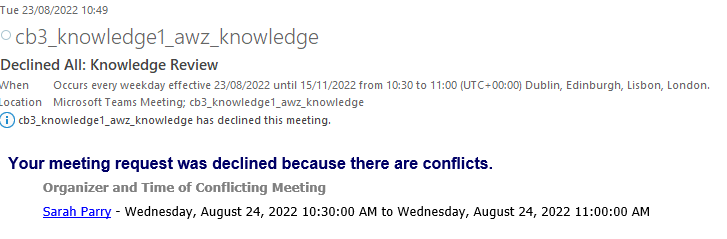
If any of the occurrences conflict with appointments on the room calendar, you will receive an email notification that your request has been declined, enabling you to rebook a different available timeslot or a different room from the list.
Editing a repeat booking
When you click on the booking, you will be given the option to open just that occurrence or the entire series.
Click The entire series to make changes to all occurrences or Just this one to edit just one occurrence.

Make changes as required and click Send Update.
Cancelling a repeat booking
Right click on the meeting in your Outlook calendar, the menu will give you the option to either cancel the occurrence or the series.
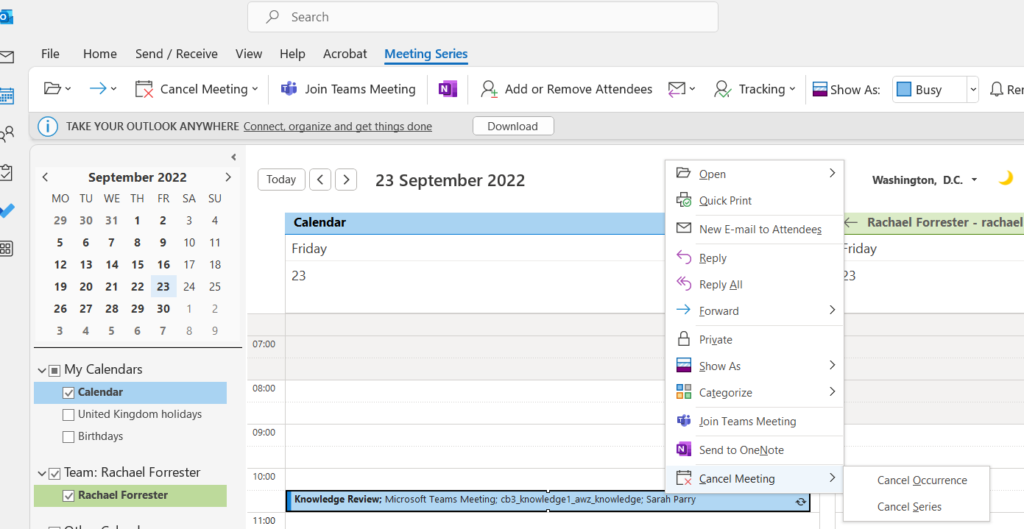
If you cancel the occurrence, all others will remain in the calendar, if you cancel the series, all will be deleted.