As well as the portal, you can book a resource on our mobile app. To find out how to get the app please see How to download and log into the Cloudbooking Mobile App.
Content quick links
Booking a resource
List view explained
Booking via the List view
Floor plan view explained
Booking via the Floor plan
Booking a Repeat Series
Editing a booking
Editing a Repeat Series
Deleting a booking
Deleting a Repeat Series
Checking into and out of a booking
Booking a resource
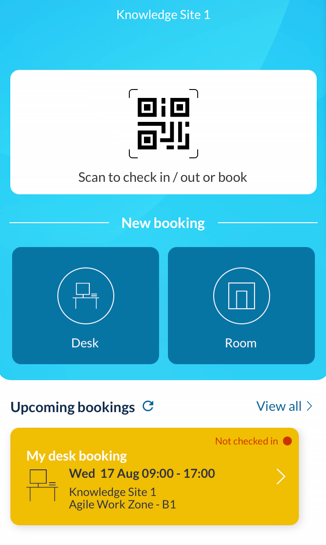
Open the mobile app on your device. If you need to log in and are not sure how to, please see How to download and log into the Cloudbooking Mobile App. Once logged in, you will be brought to the main home screen of the app, from where you can pick which resource you would like to book.
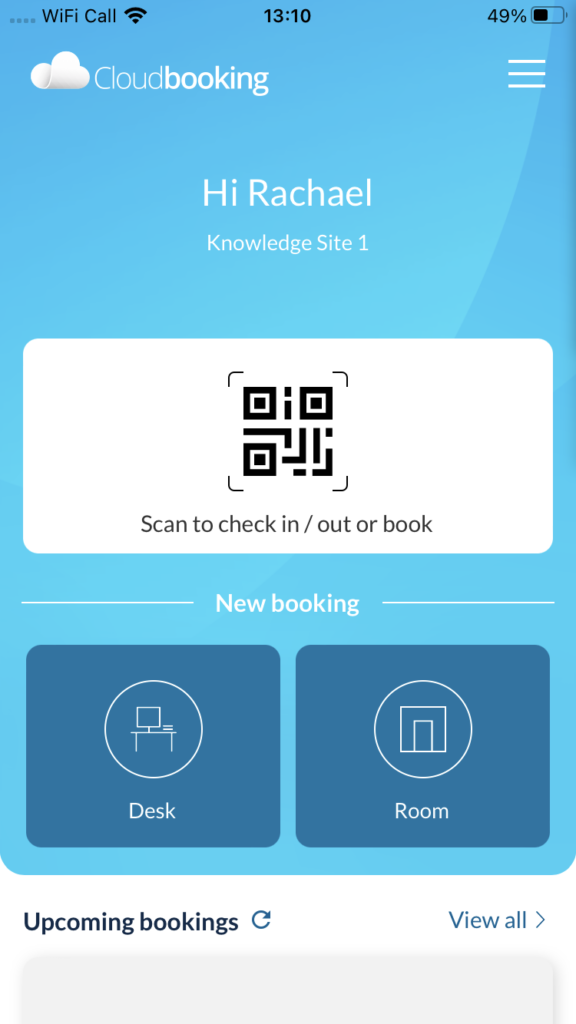
Under New Booking select the resource you wish to book.
Selecting the resource will bring you to either the List view for the resource, or the Floor plan for the resource. You can switch between the two views by selecting either List view or Floor plan in the top right of the screen.

List View explained
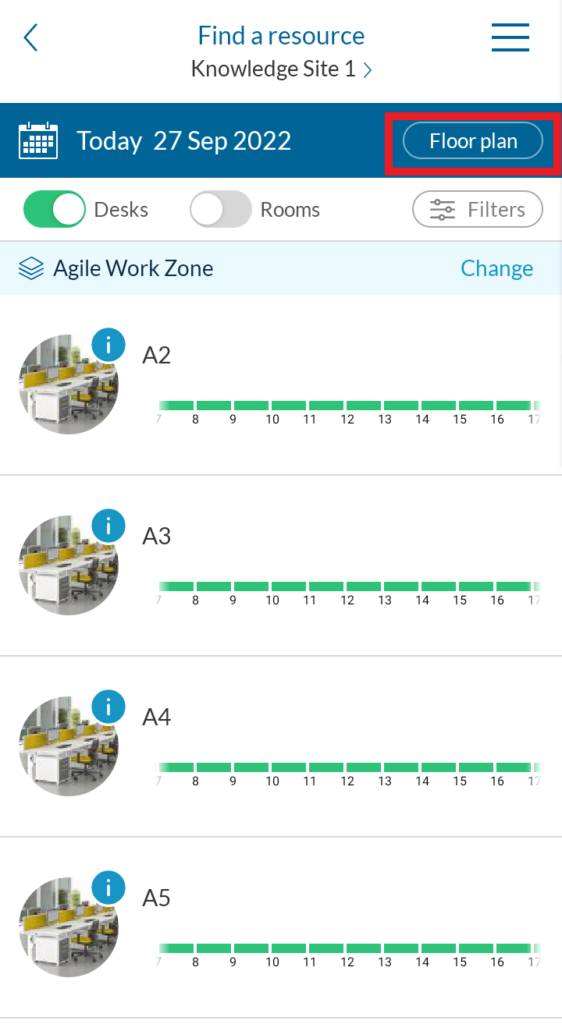
At the top middle of the page, you can select the site you wish to book from. Selecting this will allow you to navigate to another site. Please note: This is only if you have access to multiple sites.

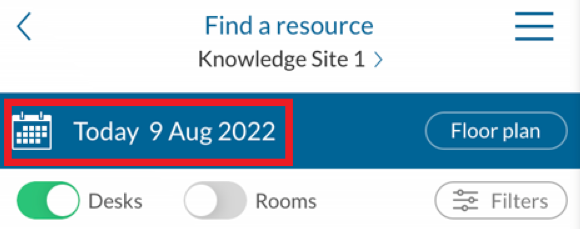
On the top left of the screen is the date selector. If you select this you can choose which date you would like the resource for.
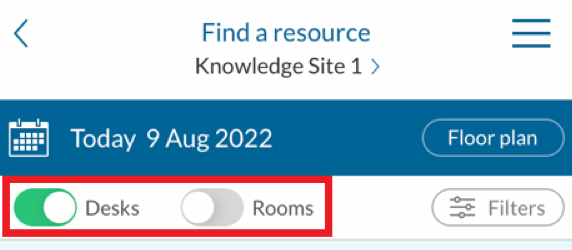
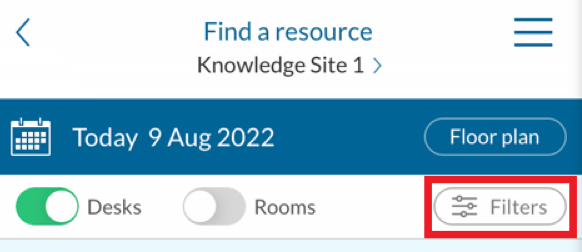
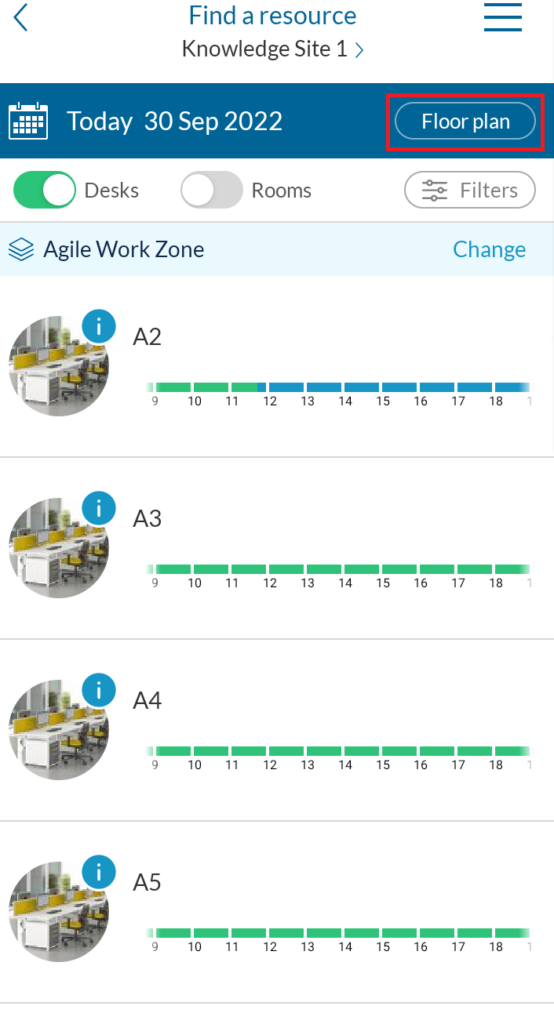
The toggles allow you to see which resource you are currently looking at in the list – green toggles mean you can see this resource, grey means they are hidden. The below example is looking at Desks not Rooms.
PLEASE NOTE: On the floor plan you can have both resources toggled on and visible but you can only view one type of resource on the list view.
You can filter the resources by Disabled access and fixed equipment by using the Filters tab on the right. Selecting the tab will show the list of filters that you select. This will narrow down the list of resources to just those with the relevant access or equipment.
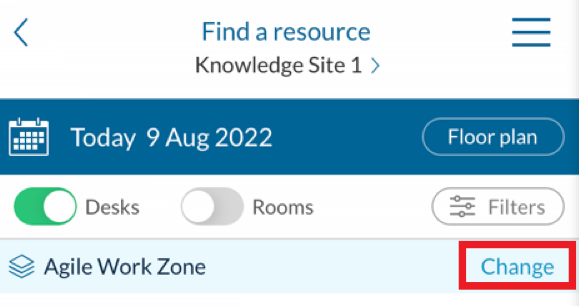
The app will default to the same area the portal defaults to. You can change this to look at other areas selecting Change next to the area name.
Booking via the List view
There are several options when looking at the List view that can changed to find the particular resource you require. To see the options in more detail please see List View Explained.
Open the app and select the resource you wish to book under New Booking. PLEASE NOTE: This guide shows how to book a desk however it is the same process for booking rooms.
Once on the list view, select the date by using the date selector at the top of the screen, add any filters you wish and make sure the area you are looking at is where you want to book. You can see the filters selected are shown in the top bar and all available desks will be shown in the list.
A green timeline on the on the resource indicates it is free to book and red indicates it is already booked.
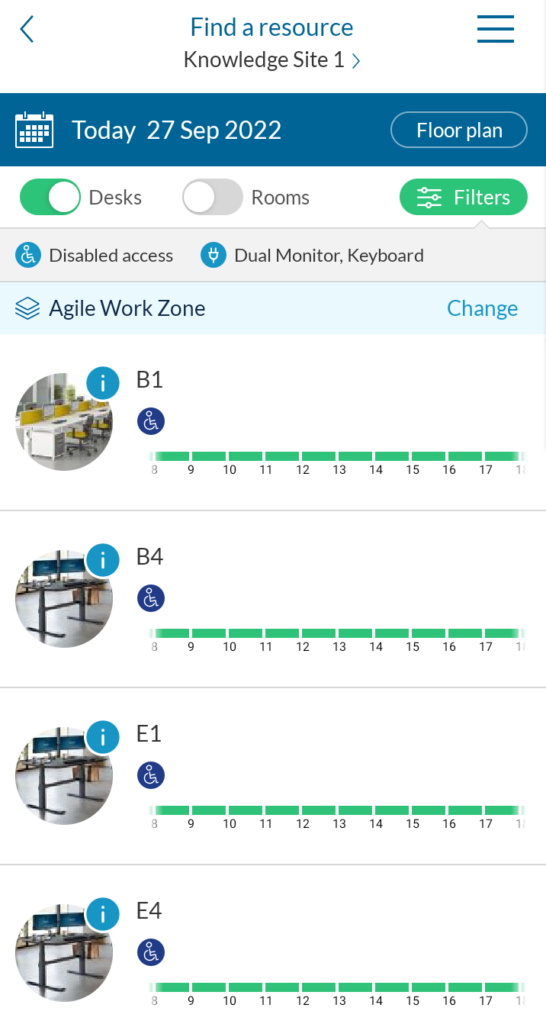
Select the desk you would like to book. This will take you to the My desk booking screen.

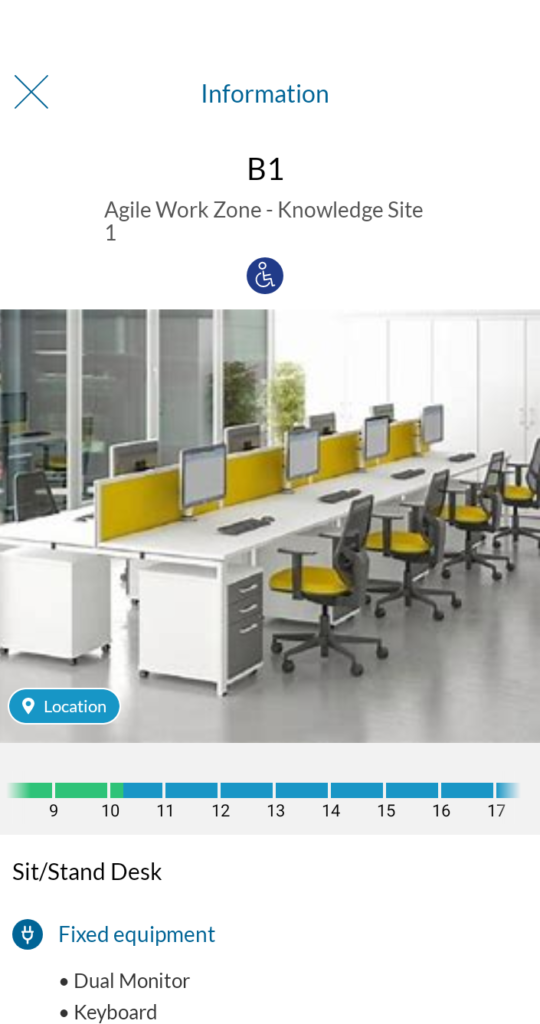
If you need further information on the desk, then selecting the desk image will show you the desk information and if you wish to see where the desk is situated, selecting Show location will show you the location on the floor plan if there is one.

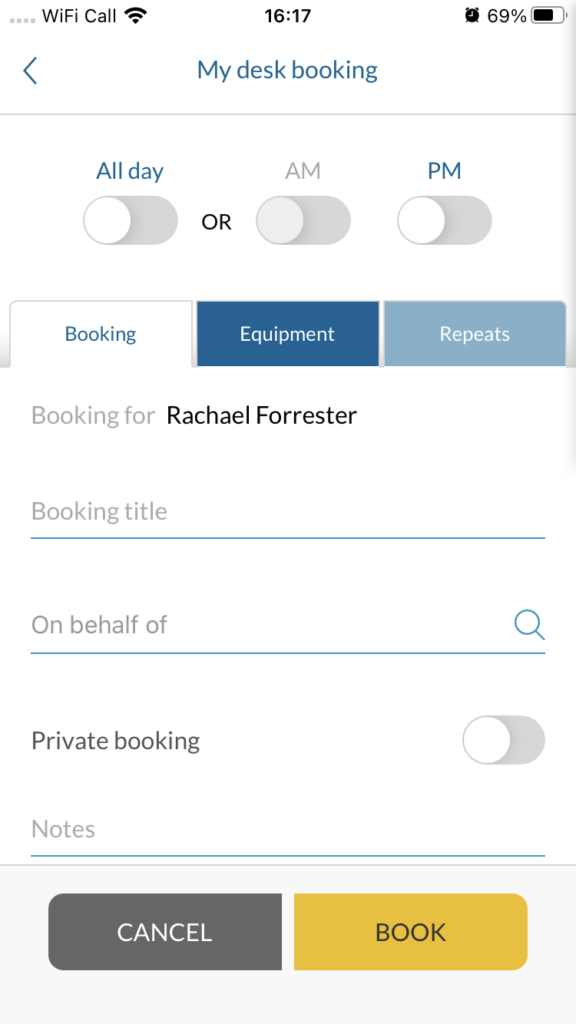
Once you are happy with your selection make sure all the details of your booking are correct. The time will automatically fill for a whole day, however you can amend this by selecting the beginning and end to change the time, or toggle AM / PM if you would like a morning or afternoon booking.

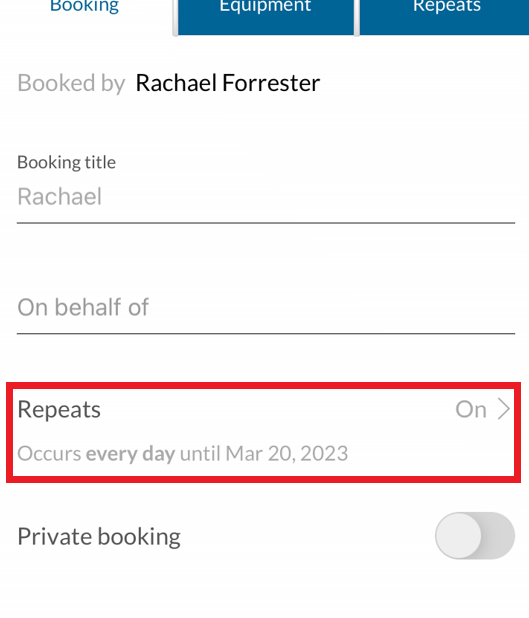
Scrolling down will display firstly the screen which allows allow you to add further details, such as Booking title, On behalf of, Attendees (for room bookings only), Repeats, Private booking (only if Private bookings is enabled on your portal) and any Notes. Also, you will see tabs for Equipment and Repeats.
The Equipment tab enables you to add equipment to your booking

The repeats tab will appear grayed-out if there are no repeat bookings linked to the booking. If there are repeat bookings you will be able to click on this tab and see when they occur. For more information on booking a repeat series please see Booking a Repeat Series.
Once all the details have been added select BOOK and your booking will be completed. You will see a success message and the booking will now appear on your home screen.

Floor plan view explained
When you first log in to the app to make a booking, it will default to List view. You can change to Floor plan view by clicking Floor Plan at the top of the screen.
This will take you to the floor plan view which will default to a full day. This can be adjusted by clicking in the red highlighted area shown below:
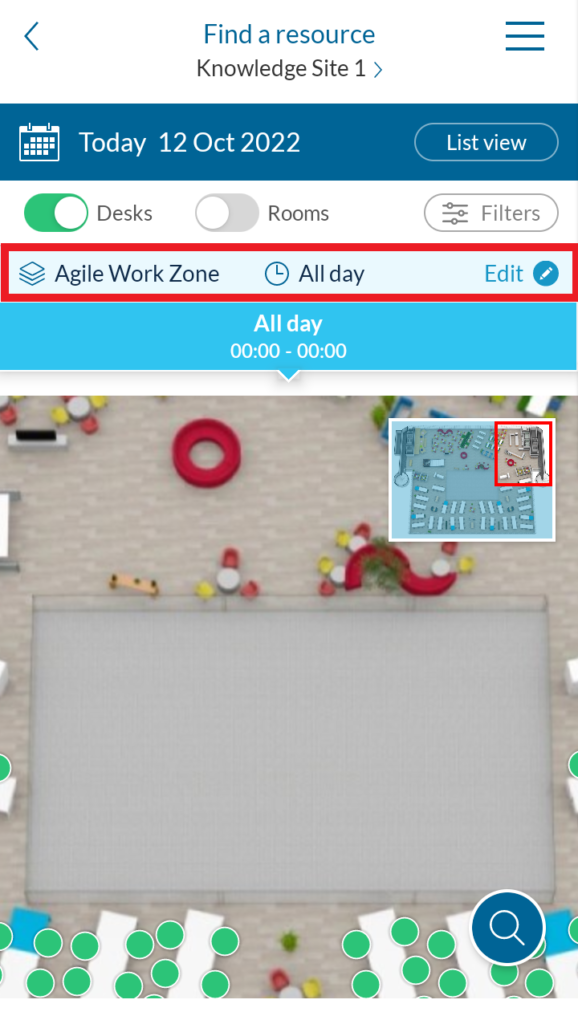
At this point, you can select a Timeslot duration which can be either All day, AM/PM, 60 mins, 30 mins or Custom.
You can also select the Location of your booking. e.g. – Which floor or work zone.
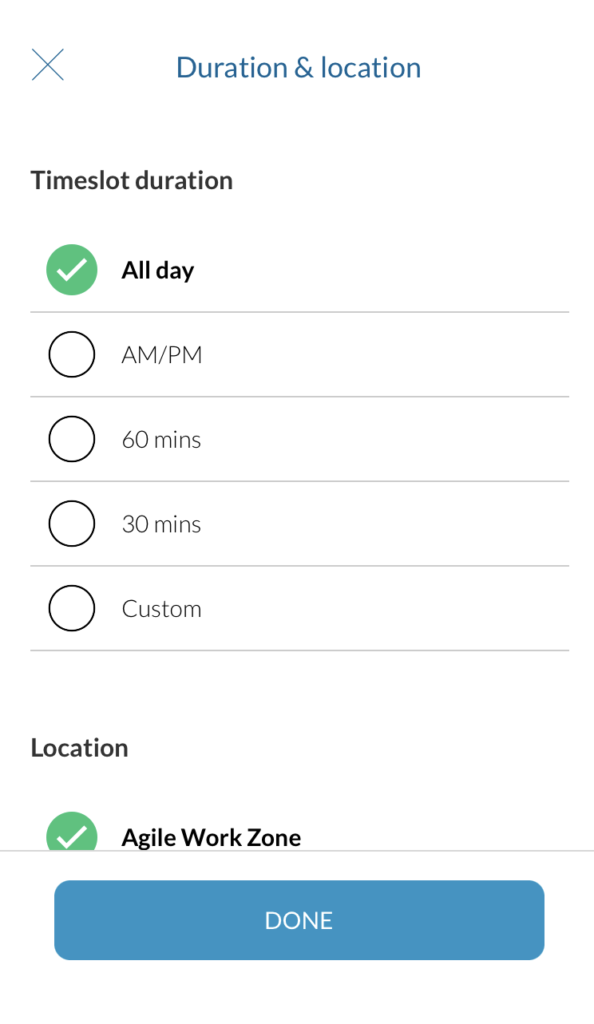
Make your selection and click Done.
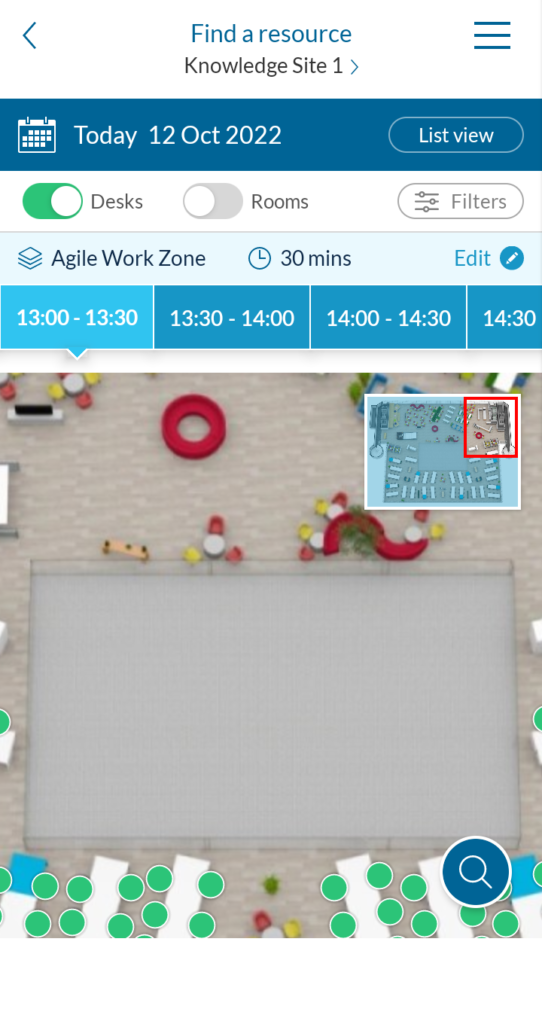
Your time slot and location selections will now be visible on the top bar. If you have selected AM/PM, 60 or 30 mins you can change the selection by scrolling through the bar and selecting a new time slot. If you have selected Custom you will need to select Edit and change the time selection.
Booking via the Floor plan
With the Floor plan open you will see all the available resources as green pins. Selecting a green pin will open the desk information screen. To understand what the pin colours mean on the Floor plan, please see Pin colouring explained.
Select BOOK to be taken to the desk booking screen.
You will now be taken to the My Booking screen

Once in the desk booking screen, the process is the same as above, enter all relevant details, time, title etc and select BOOK to complete.
Booking a Repeat Series
To book a repeat series select Repeats as shown below:

You will then see the Repeats screen where you can select the Frequency field to edit the frequency of the repeat bookings:

You will then see the screen to add a series:
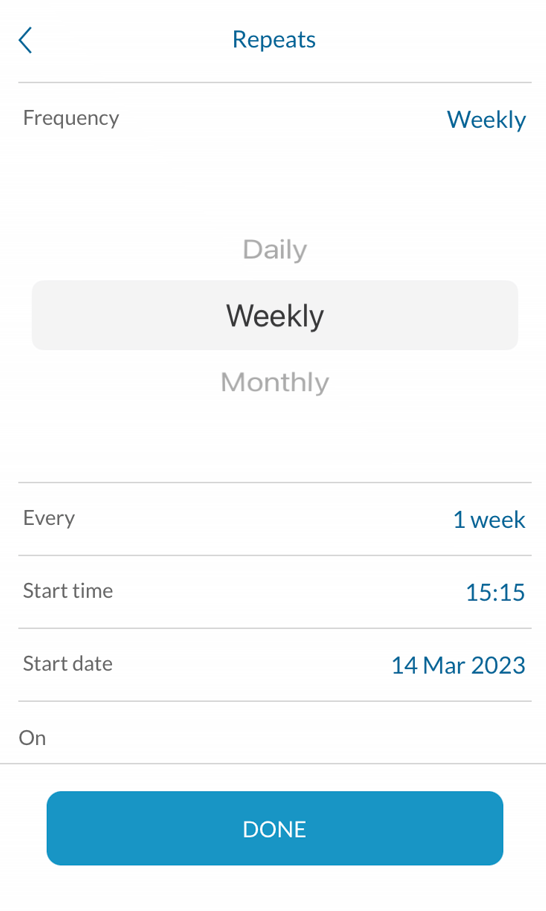

Here there are several options for you to choose from depending on your needs:
Daily
Weekly
Monthly
You can then indicate whether the repeat is for every day, ie selecting daily and entering 1 day in the Every field, every week or every month, every 2 weeks etc. Select the Start time and date you wish the series to begin and then the End time and date you wish the series to end.
PLEASE NOTE: The start/end time and date will be automatically populated based on the selection you have made when initially booking the resource.
If required, for weekly and monthly you can also specify a day of the week or multiple days you wish the repeat to occur.

Once you’re happy with your repeat select DONE and it will be added to your booking.
Editing a booking
If you need to edit your booking, you can do this by selecting the booking you wish to edit on your home screen. When you first open the booking it will say CLOSE and DELETE, however once you have amended details of the booking it will change from DELETE to SAVE. Make all changes necessary and then select SAVE.

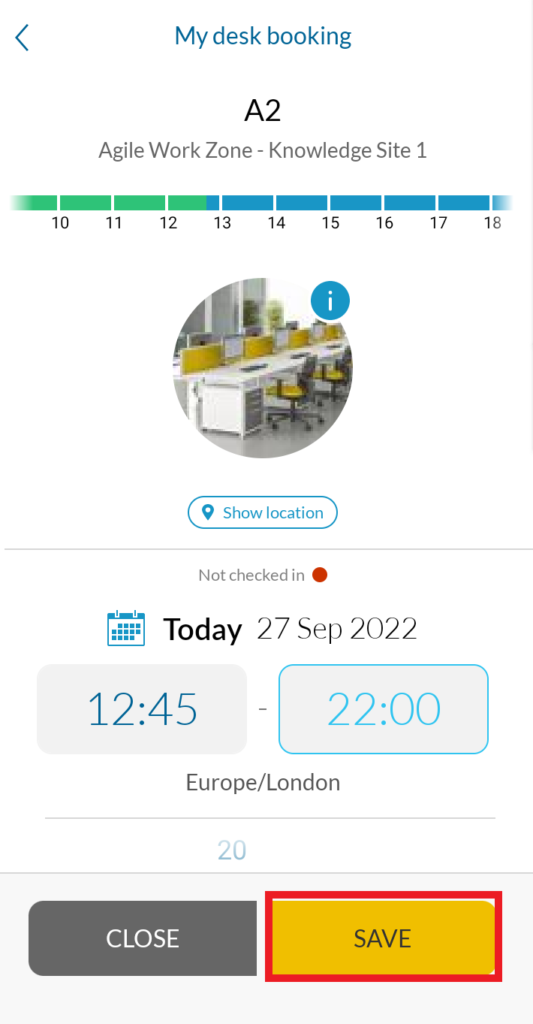
You will receive a success message confirming your booking has been updated.

Editing a Repeat Series
If you wish to edit a repeat series, either a single occurrence or the whole series you can do this by selecting the occurrence you wish to edit for a single change or any of the occurrences in the series for a whole series change.
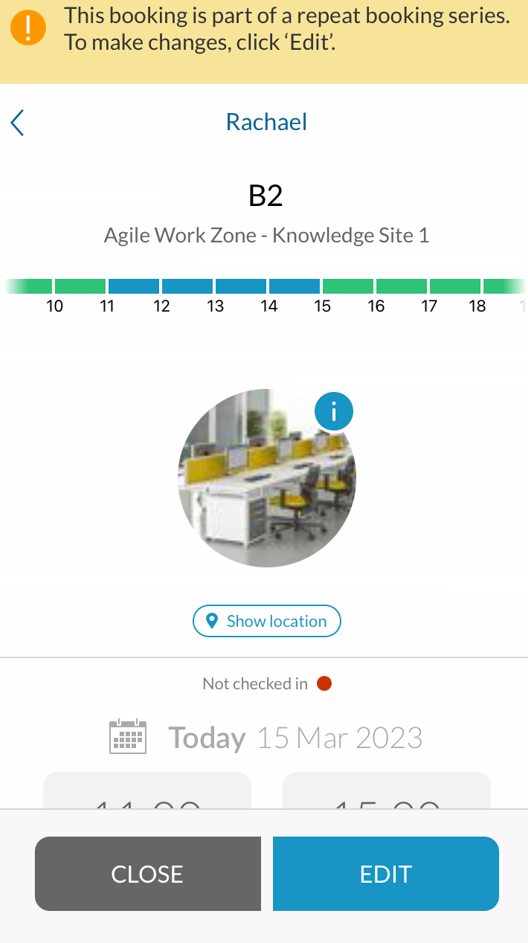
PLEASE NOTE: There is a warning at the top of the screen that will confirm the booking you have selected is part of a series.
To begin editing select EDIT.
You will then receive a message asking what you would like to edit, WHOLE SERIES or ONLY THIS OCCURRENCE:
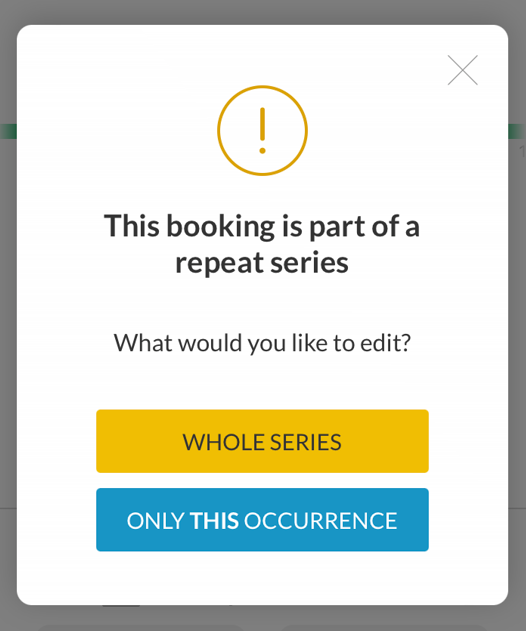
Select the option you would like then make the edits to your booking followed by SAVE or SAVE SERIES. You will then see the success message confirming the changes have been made.

PLEASE NOTE: If you have previously made changes to individual occurrences in a series and then make another change to the whole series after, your changes to the individual occurrences will be lost and you will have to make those again if you still need them.

Deleting a booking
Select the booking you wish to delete on either the home screen or by selecting View all next to Upcoming bookings and selecting the booking from the list.

Once you have selected the correct booking, select DELETE on the booking screen.
You will then receive a success message confirming your booking has been cancelled.

Deleting a Repeat Series
To delete a repeat series follow the above instructions on Editing a Repeat Series and select just one occurrence or a whole series but instead of changing the details and saving select DELETE or DELETE SERIES.

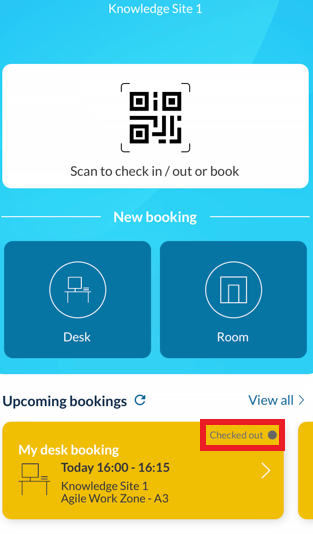
Checking into and out of a booking
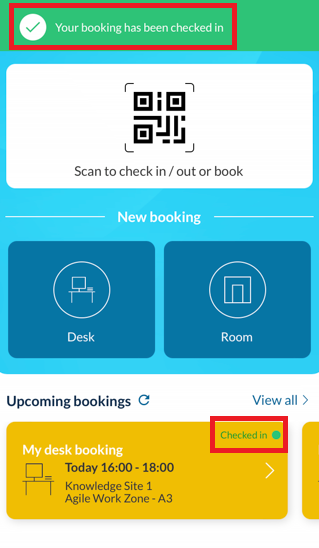
When you arrive for your booking you will need to Check in so that the booking system and your organisation know you are there. You can do this one of two ways, if you have QR codes you can check in using the QR code by scanning it with your app and selecting CHECK-IN. Secondly you can select the booking on the home screen of your app and select CHECK-IN.
PLEASE NOTE: If you do not check in to your booking the resource will be released back into the system after a set time (usually 15 minutes) and made available for others to book.
Once you’ve checked in, you’ll receive a success message and your booking will display Checked In.
To Check out of a booking, either scan the QR code from your app or select the relevant booking from your list and select CHECK-OUT.

You’ll receive a success message once you have been checked out and your booking will show as Checked out.

When your booking is complete, you will receive an email confirmation containing details of your booking and an attached ICS file which, when opened, will update your Calendar with your booking.